Learn AWS Cloud – Step by Step Guide

AMAZON WEB SERVICES (AWS)

What is AWS?

Amazon Web Services (AWS) is a comprehensive, emerging cloud computing platform provided by Amazon. AWS is a huge set of on-demand services on cloud with pay-as-you-go pricing model. The technology allows customers to have a virtual array of computers, available all the time, through the Internet – all at their disposal. AWS lets you do your tasks on the cloud in a similar way as you would do on a physical computer, like configuring a server or running an application.

AWS is the pioneer in the cloud computing field. It started offering cloud solutions for the first time in 2006, and has seen unprecedented success since then.Today it is way ahead of its competitors – Microsoft Azure, Google and IBM. AWS was initially built by Amazon’s internal IT resource management, which expanded and grew into an innovative and such a cost-effective cloud solution provider.

Cloud offers some unbelievable advantages which makes it so popular in comparison to on-premise technologies. Since with cloud, we don’t need to plan for servers or other IT infrastructure in advance, a lot of time is saved. Cloud services can spin up hundreds or thousands of servers in a few minutes and deliver amazingly quick results. AWS is cost efficient too as we pay only for what we consume with no up-front investment and no long-term commitments.

Today, AWS powers a multitude of businesses in 190 countries around the world. AWS offers flexible, reliable, scalable, easy-to-use, and cost-effective solutions and allows enterprises to focus on their core competencies while Amazon takes care of the IT and cloud related issues. Let us understand the impact through an example – Netflix is a popular video streaming service which the whole world uses today. Back in 2008, Netflix suffered a major database corruption, and for three days their operations were halted. The problem was scaling, that is when they realized the need for a highly reliable, horizontally scalable, distributed system in the cloud. They started using AWS, and since then their growth has been off the charts.

AWS offers a blend of services – infrastructure as a service (IaaS), platform as a service (PaaS) and packaged software as a service (SaaS). There are approximately 100 services that AWS offer which include services for compute, databases, infrastructure management, application development and security.

What are the top AWS products?

Amazon EC2 and Amazon S3 are the two main Infrastructure as a Service (IaaS) services by AWS.

EC2: An EC2 instance is a virtual server in Amazon Web services terminology. It stands for Elastic Compute Cloud. It is a web service where an AWS subscriber can request and provision a computer server in AWS cloud. EC2 provides you configuration capacity in an effortless and smooth manner. EC2 gives you complete control of your computing environment with high availability, scalability, and cost-effectiveness.

Using an on-demand EC2 instance, by AWS, a subscriber/user can rent the virtual server on an hourly basis and use it for his/her applications’ deployment. The hourly charges would depend on the type of the EC2 instance chosen. There are multiple instance types available as options, to choose from according to the user’s business needs. This means that one can rent an instance based on his own CPU and memory requirements and use it as long as he wishes to. You can terminate the instance when it’s no longer required to save costs. This is the most impressive advantage of an on-demand EC2 instance.

S3: This is the Amazon Simple Storage which lets you store and retrieve huge amounts of data anytime, anywhere through the web interface, in a seamless manner. It allows software developers to have access to the data quickly in an inexpensive, reliable and highly scalable manner. You can store all sorts of folders, files, and documents on the AWS S3.

RDS: This is an Amazon Relational Database Service. which is highly scalable.

It provides a simple, cost-efficient database in the cloud that automatically does database setup, hardware provisioning, backup and patching for you. Its primary benefits are high availability, fast performance, security and compatibility.

DynamoDB: This is an Amazon NoSQL database in the cloud that provides extremely high latency at any scale. It offers highly reliable and fully managed service with built-in security, in-memory caching, backup and restoration.

VPC: This is an Amazon Virtual Private Cloud which acts as a cloud data center for deploying all your resources. VPC offers very high security as you isolate all your resources on the Amazon cloud. There is complete freedom to work within your virtual networking environment, along with selection of IP addresses, creating subnets, configuring route tables and network gateways. AWS VPC provides logically isolated cloud provisioning wherein you can launch your AWS resources.

Why should you learn AWS?

Some of the major reasons why one should learn AWS are:

  • AWS is an amazing cloud computing standard.
  • AWS professionals are among the best paid in the IT industry.
  • If you have the right training, then, getting AWS certified is not a big deal.
  • There is a huge dearth of certified AWS professionals in the market, owing to its
    rapid emergence.
  • There are no prerequisites to learn AWS, anyone can be a master in this top field.

How to create a free AWS cloud account?

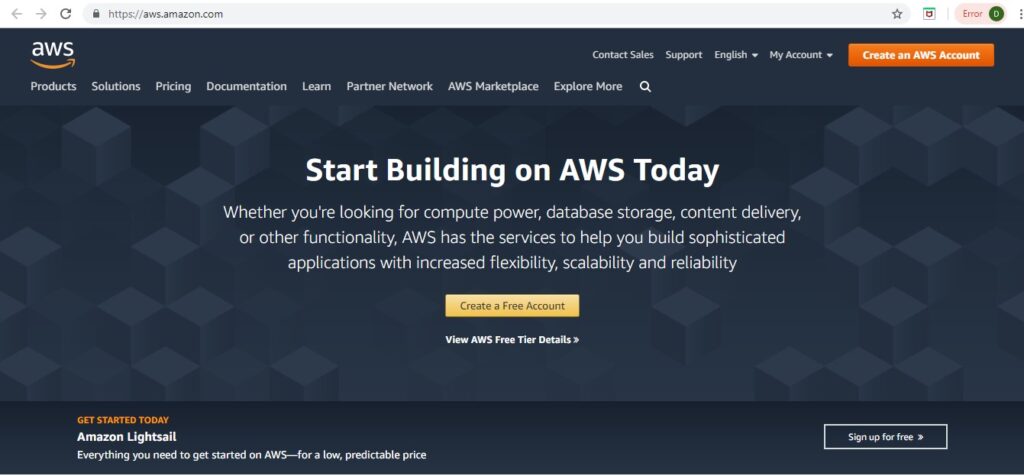
Step 1: Navigate to https://aws.amazon.com/. The first screen you will view:

Create AWS Cloud Account Step 1

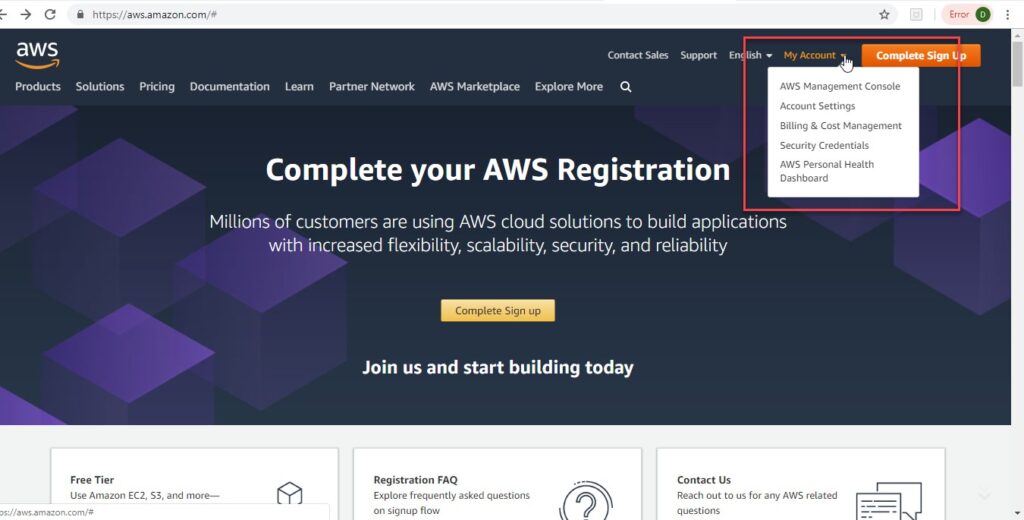
Step 2: Go to MyAccount dropdown and click on AWS Management Console.

Create AWS Cloud Account Step 2

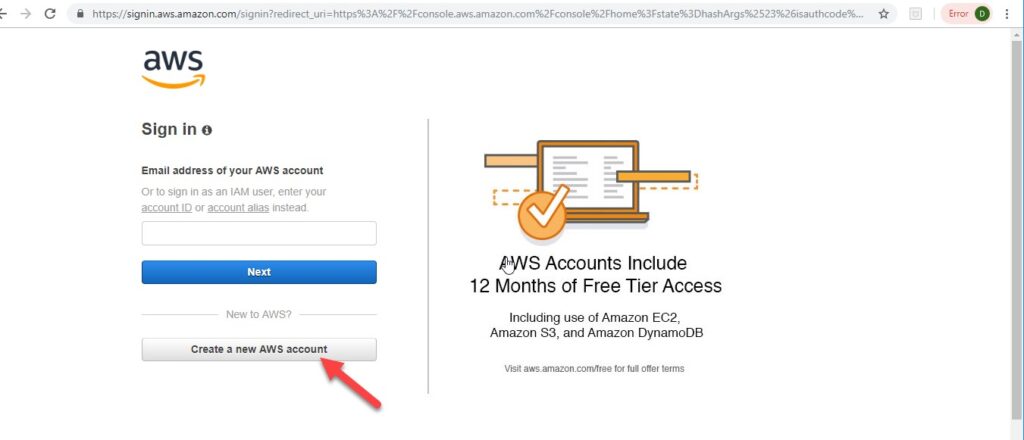
Step 3: You landup on this screen to sign in. Click on the Create a new AWS account.

Create AWS Cloud Account Step 3

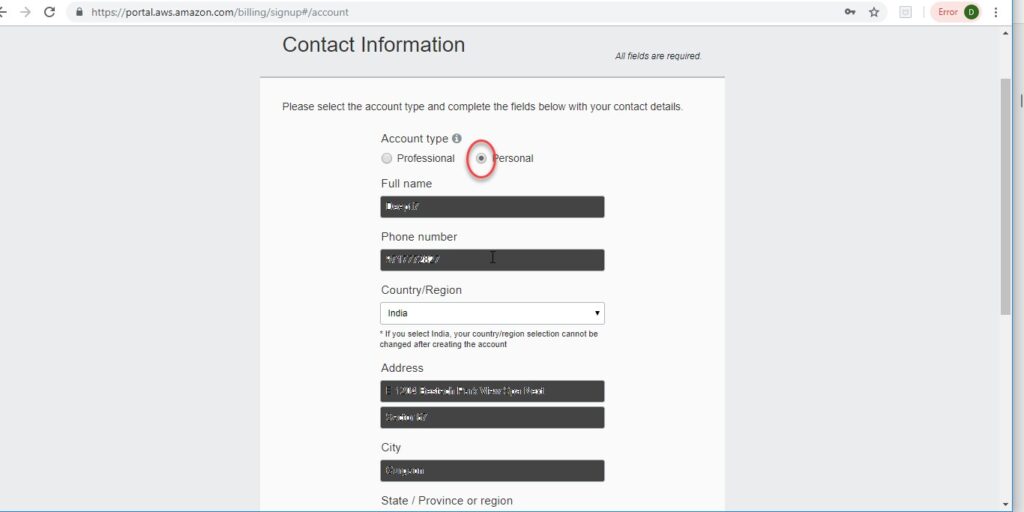
Step 4: Enter the details below and click Continue.

Create AWS Cloud Account Step 4

Step 5: Select the Account type as Personal and enter the details. Select your Country from the dropdown.

Create AWS Cloud Account Step 5

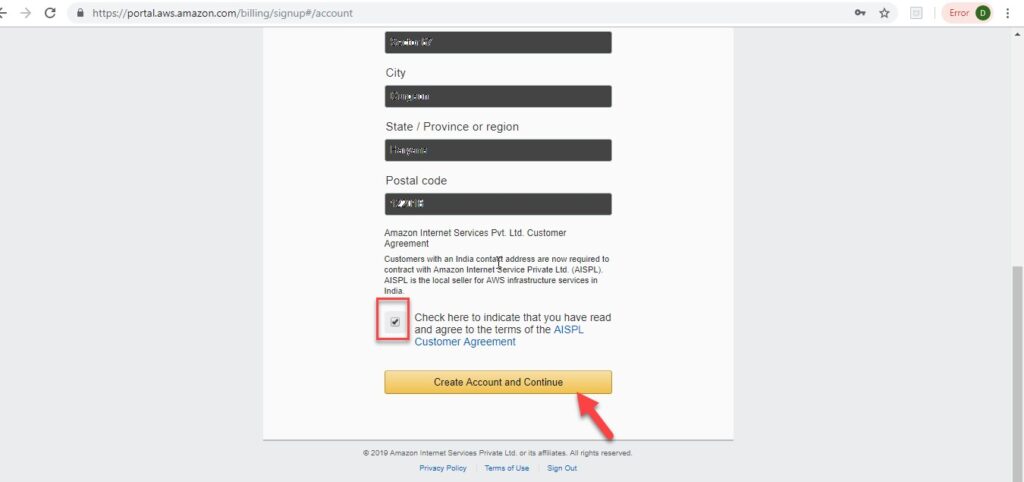
Step 6: Enter the details and click the check here checkbox and Create Account and Continue.

Create AWS Cloud Account Step 6

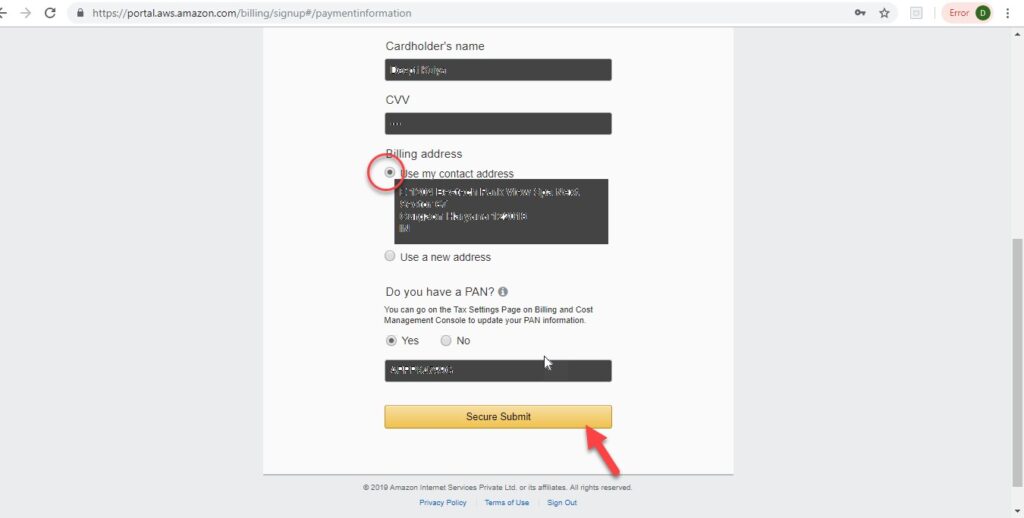
Step 7: Complete the Payment Information. Though, it is a free trial account, you need to enter the card details for dentification/verification purposes.

Create AWS Cloud Account Step 7

Step 8: Fill the required information and click Secure Submit.

Create AWS Cloud Account Step 8

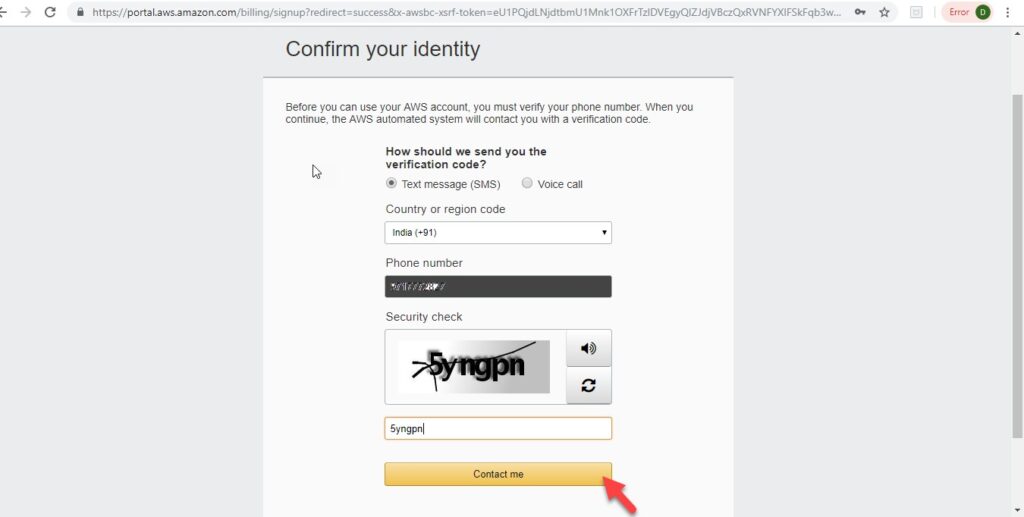
Step 9: Once the payment process is completed, you will view this screen. Fill in the appropriate details and click Contact me.

Create AWS Cloud Account Step 9

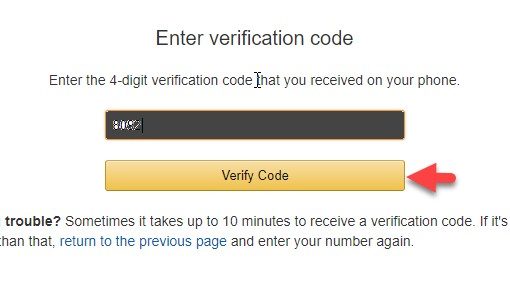
Step 10: Enter the verification code as received on the given mobile number and click Verify code.

Create AWS Cloud Account Step 10

Step 11: You will view the below screen

Create AWS Cloud Account Step 11

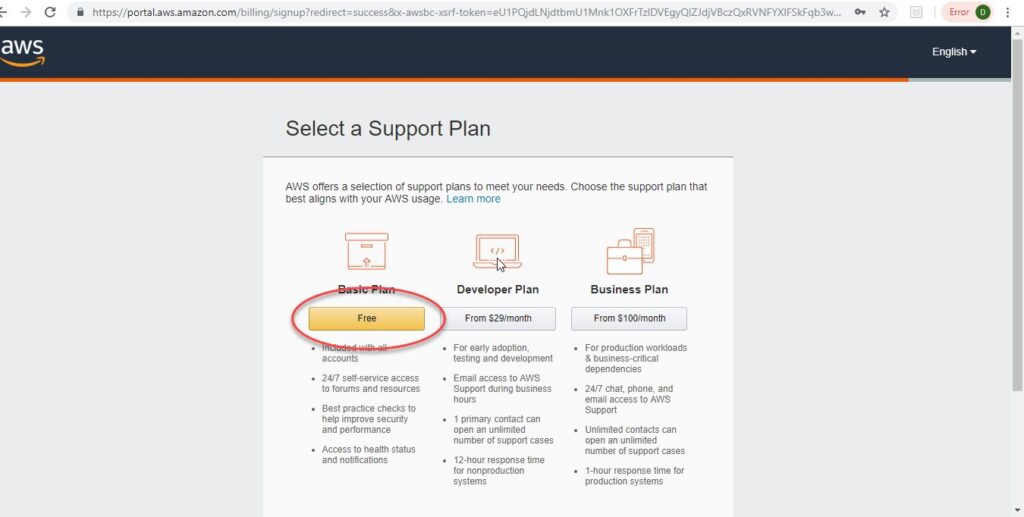
Step 12: Choose the Basic Plan by clicking Free button on the screen as below.

Create AWS Cloud Account Step 12

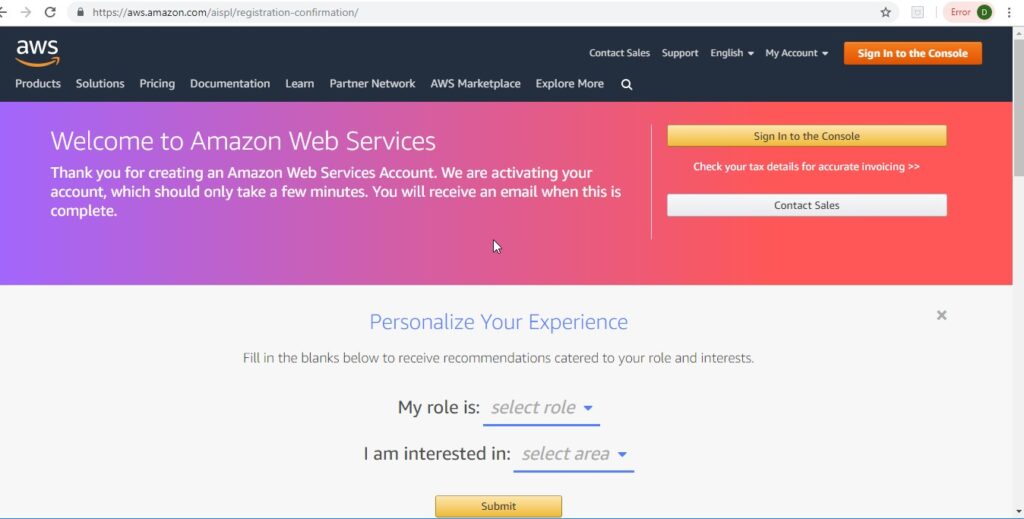
Step 13: You have successfully created your AWS free account. You should see this welcome screen.

Create AWS Cloud Account Step 13


How to create a new Ubuntu Virtual Machine?

Now, let’s create a new VM instance on AWS.

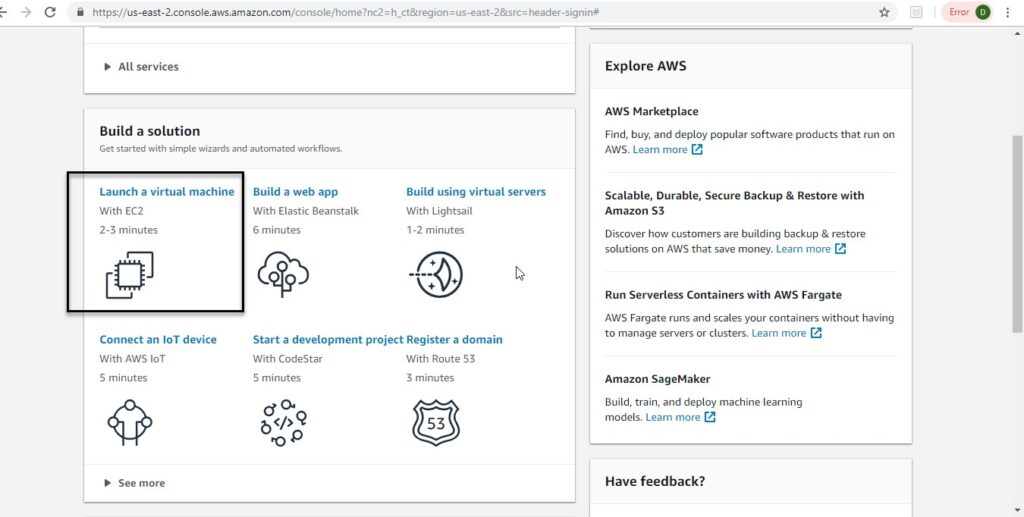
Step 1: Once you login to the console clicking the Sign in to the console button on the welcome screen above using your credentials, you view the AWS console.

Create Ubuntu Virtual Machine Step 1

Step 2: Click on Launch a virtual machine.

Create Ubuntu Virtual Machine Step 2

Step 3: Once you click on Launch a VM machine, you will view this screen.

Create Ubuntu Virtual Machine Step 3

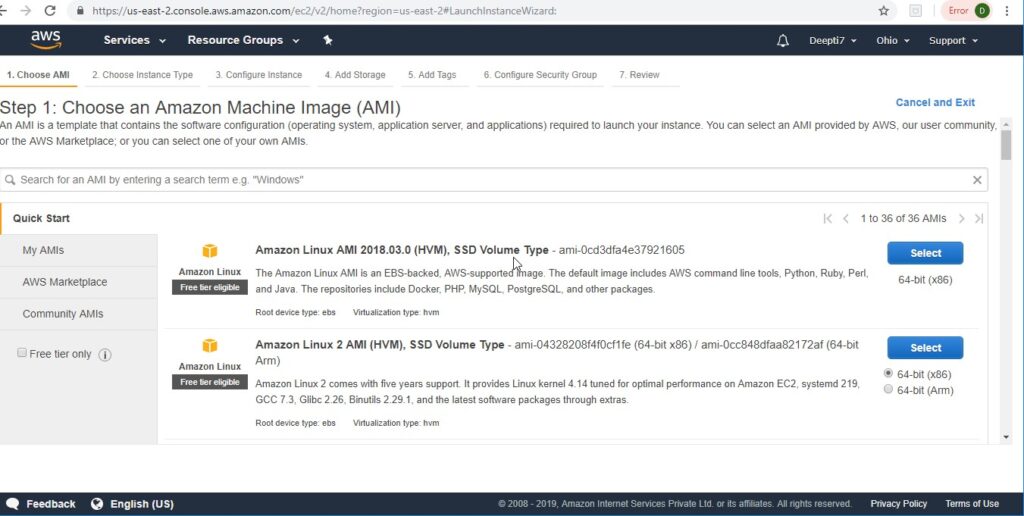
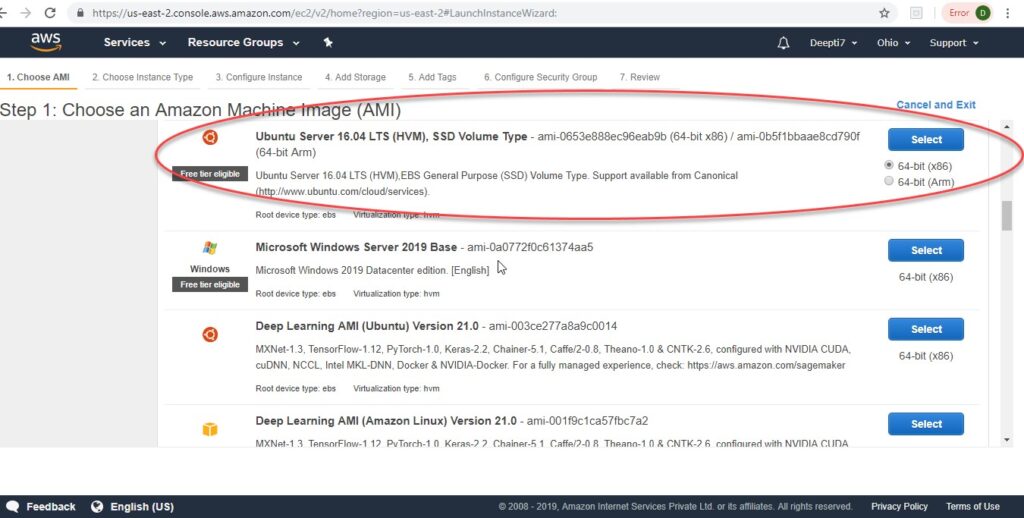
Step 4: Scroll down and Select Ubuntu Server 18.04 LTS ( Please choose latest version of Ubuntu)

Create Ubuntu Virtual Machine Step 4

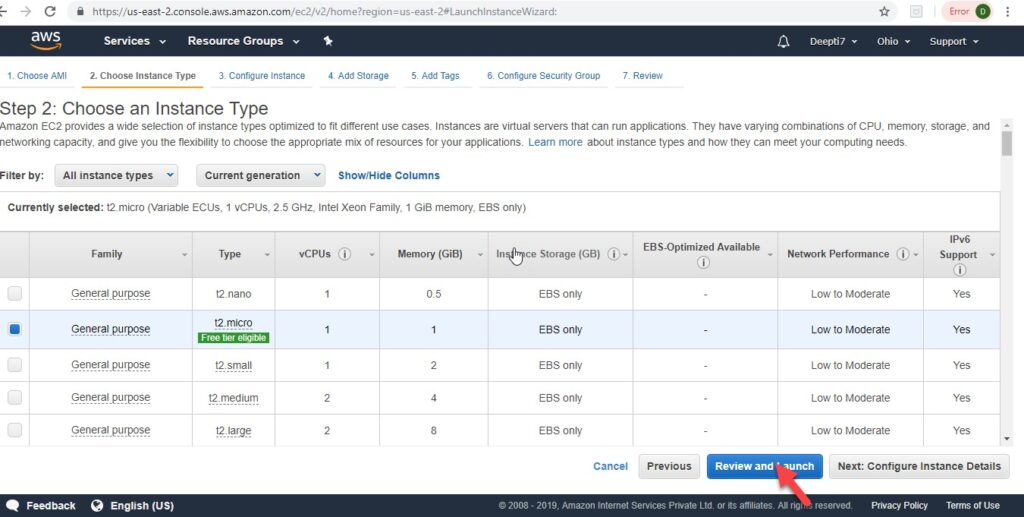
Step 5: Choose an Instance type. Le t the default selection remain and click Review and Launch button.

Create Ubuntu Virtual Machine Step 5

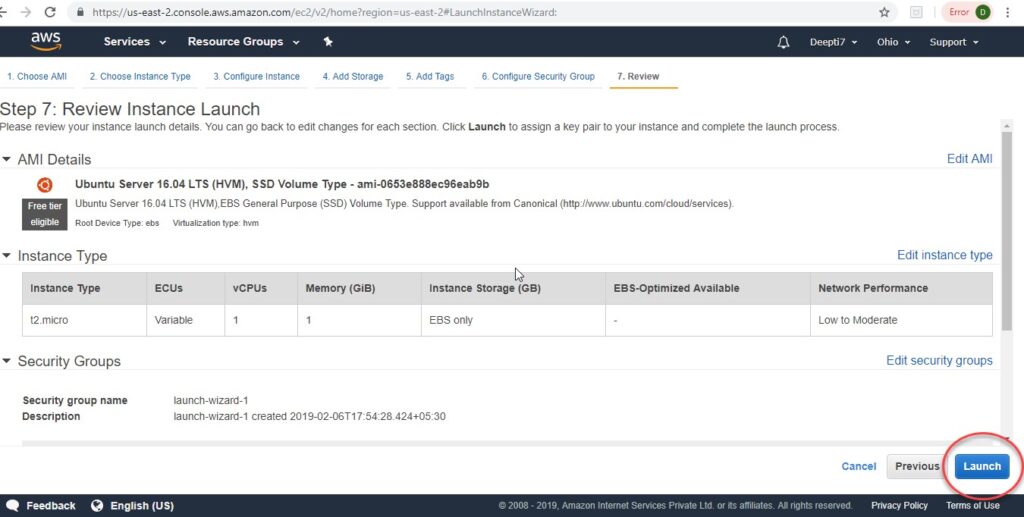
Step 6: Review Instance Launch screen. Click the Launch button.

Create Ubuntu Virtual Machine Step 6

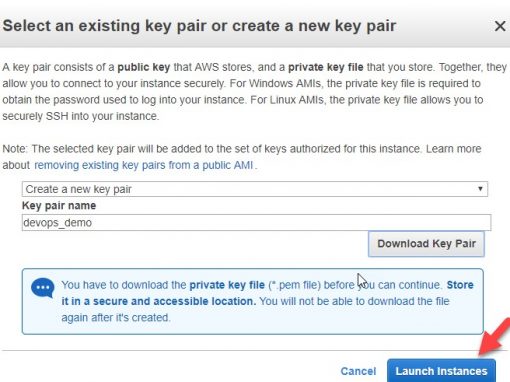
Step 7: You will see the below popup to select or create a new key pair. Select the create a new key pair from the dropdown and click Download Key Pair.

Create Ubuntu Virtual Machine Step 7

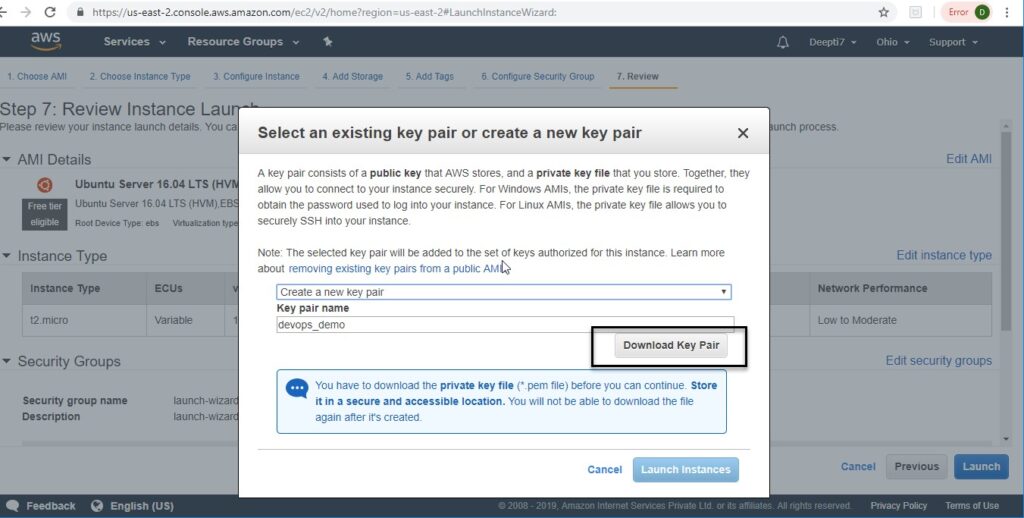
Step 8: Save the downloaded .pem file to a safe location on your computer. Then, click Launch Instances.

Create Ubuntu Virtual Machine Step 8

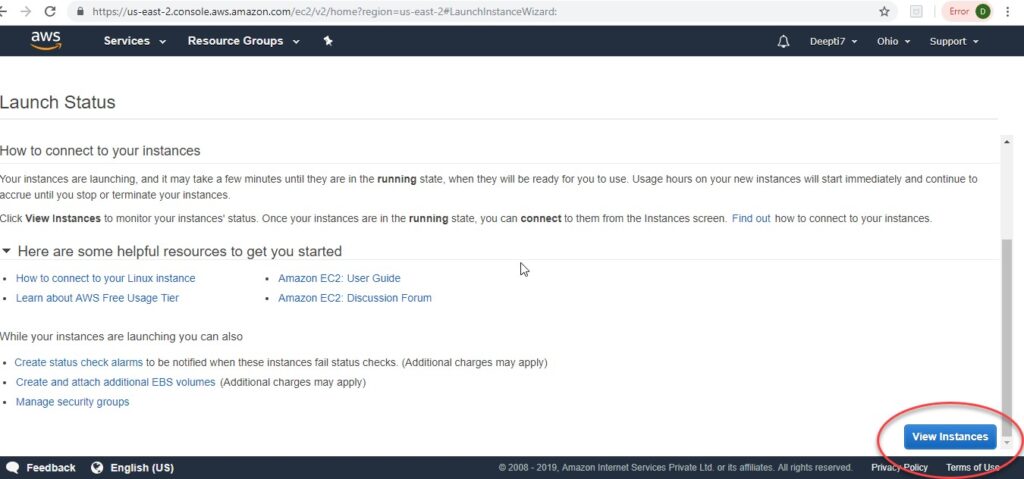
Step 9: You will view the below screen.

Create Ubuntu Virtual Machine Step 9

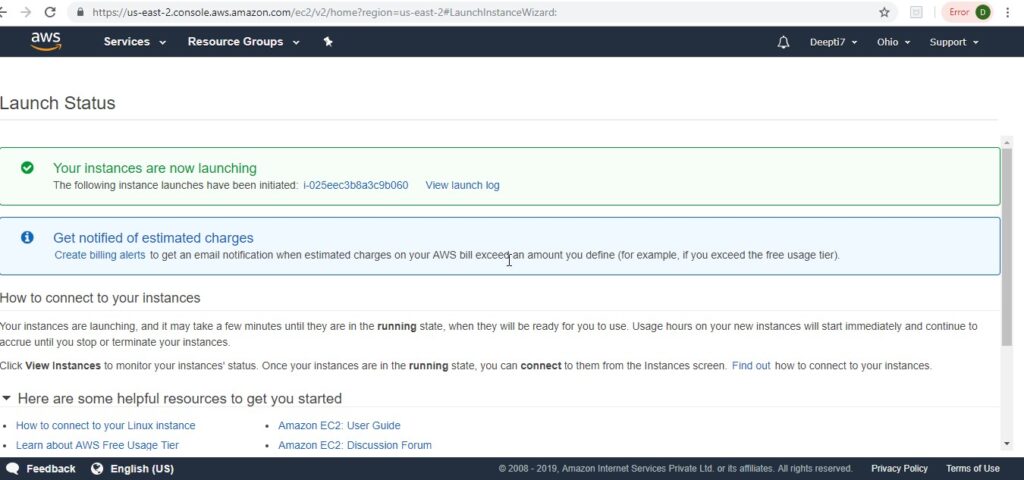
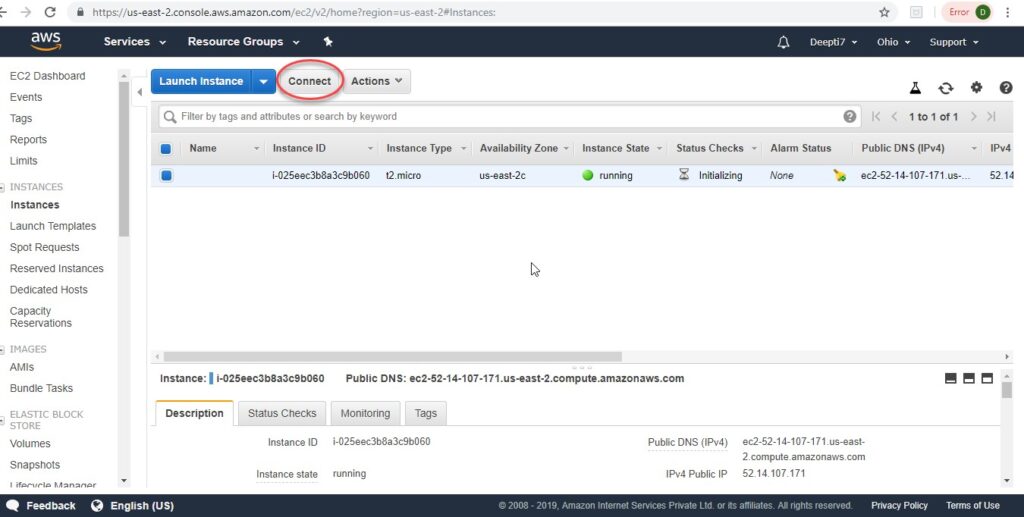
Step 10: Once the instance is launched, you will view the below screen. Click on View Instances.

Create Ubuntu Virtual Machine Step 10

Step 11: Click on Connect on the screen below.

Create Ubuntu Virtual Machine Step 11

Step 12: You will view this popup – Connect to your instance. To connect to the VM, follow the instructions and click the Close button.

Create Ubuntu Virtual Machine Step 12

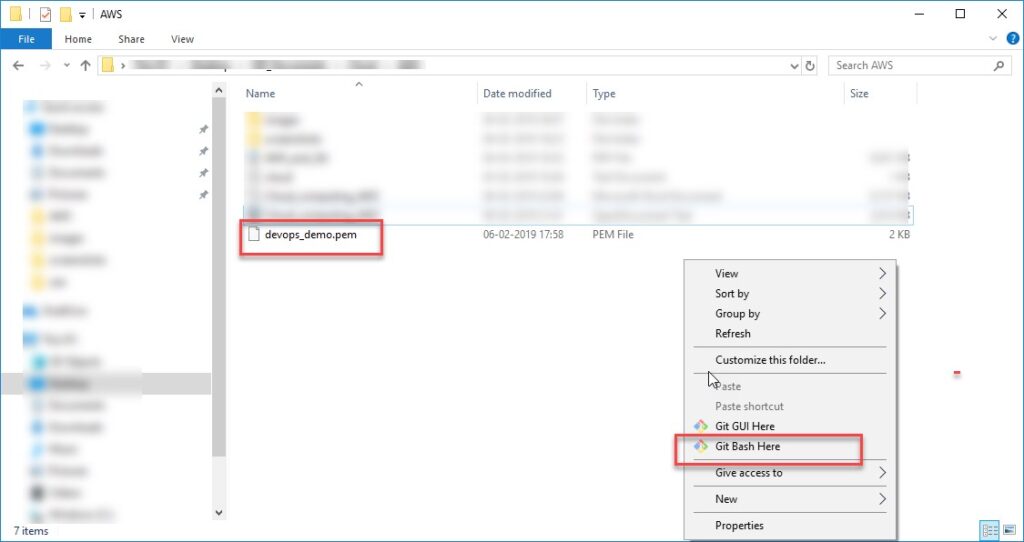
Step 13: Go to the folder where you saved the .pem file and do right click and run GitBash (You can open it from command prompt and powershell also) Here.

Create Ubuntu Virtual Machine Step 13

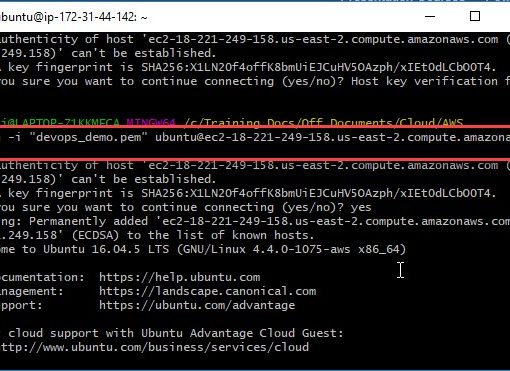
Step 14: Once GitBash opens, run the following command to the public VM instance you created.
ssh -i “devops_demo.pem” ubuntu@ec2-18-221-249-158.us-east-2.compute.amazonaws.com
The connection is established.

Create Ubuntu Virtual Machine Step 14


Open port from VPC networks

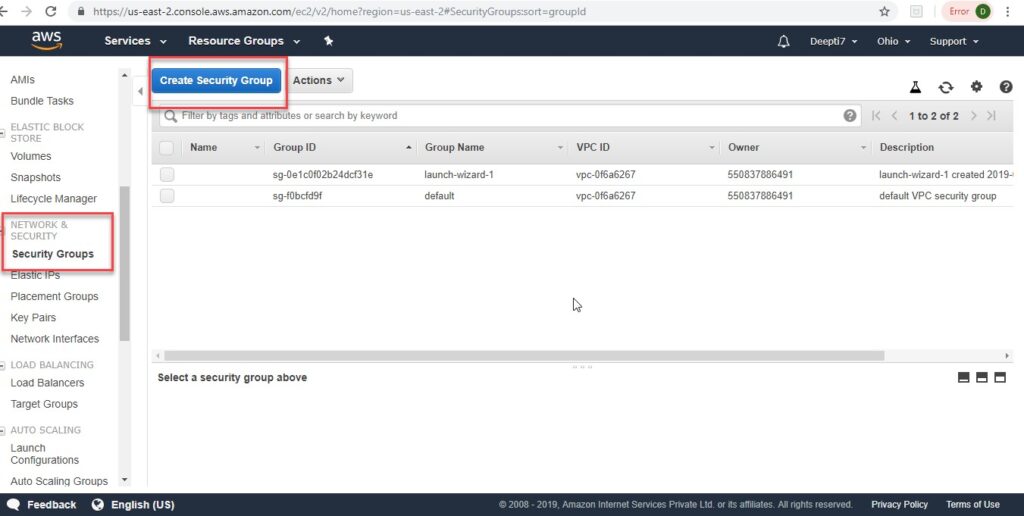
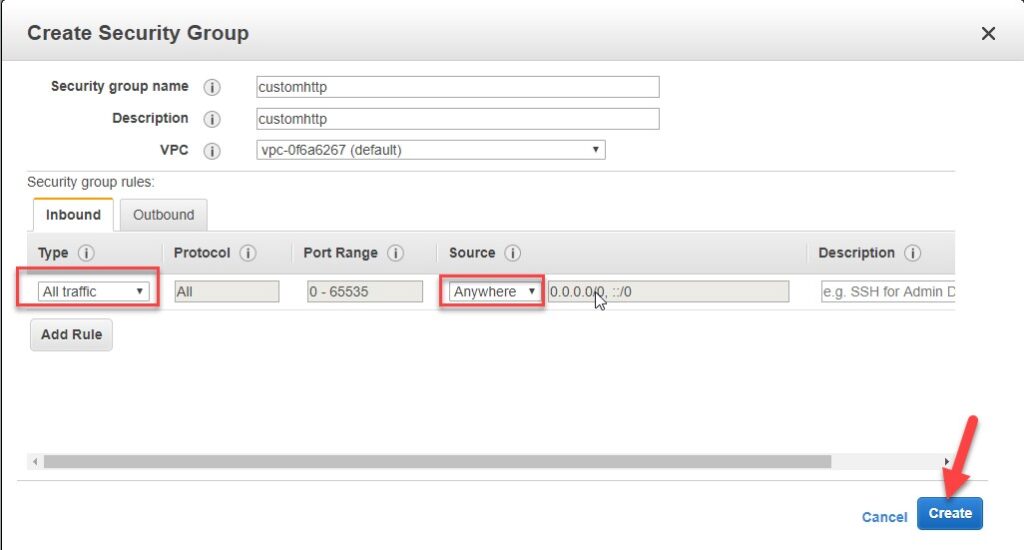
Step 1: From the left navigation menu, go to Network & Security->Security Groups. Then, click Create Security Group.

Open Port from VPC Networks Step 1

Step 2: The below screen opens.
Select All Traffic from the Type dropdown (you can choose to select a particular protocol also, here we have allowed connections using all protocols).
Select Anywhere from the Source dropdown. (allowing connection from anywhere).
Click the Create button.

Open Port from VPC Networks Step 2

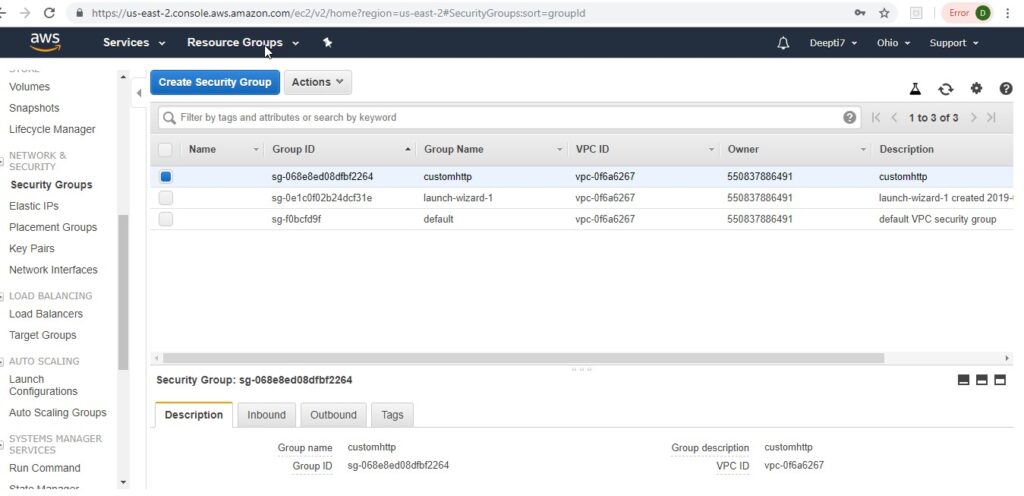
Step 3: Once the new security group is created, you will see it in the list of Security groups as below.

Open Port from VPC Networks Step 3


Run Commands on the Ubuntu VM

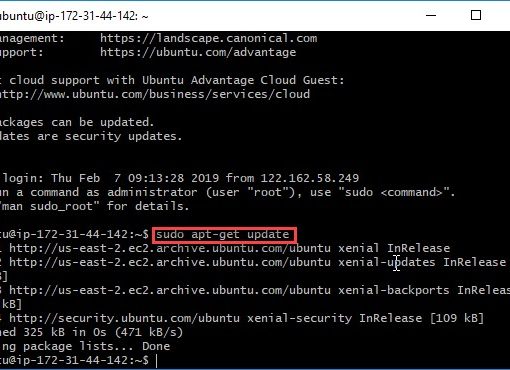
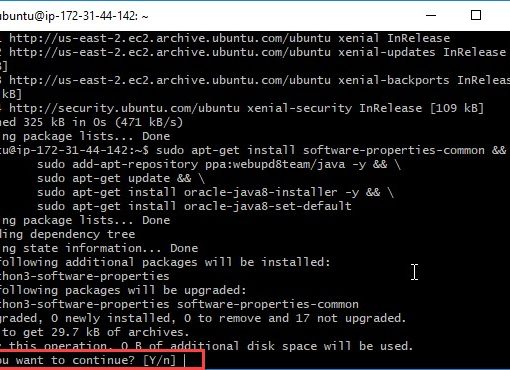
Step 1: Once the connection is made to the VM through GitBash, we will run the following command: sudo apt-get update.

Sudo is the command to get admin rights temporarily on the VM. We will get the software package update by executing the above command.

Once the command is executed and update completes, you should view the below screen.

Run Commands on the Ubuntu VM Step 1


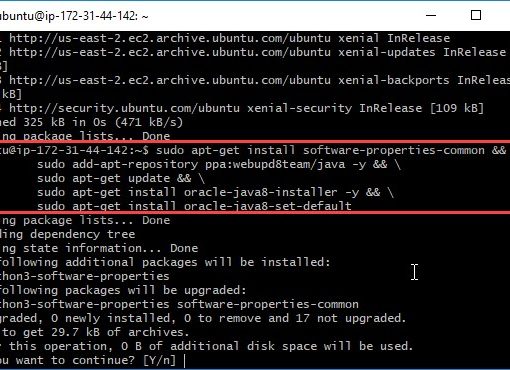
Step 2: Now, we will install JDK 8 on the VM with the command:

sudo apt-get install software-properties-common && \
sudo add-apt-repository ppa:webupd8team/java -y && \
sudo apt-get update && \
sudo apt-get install oracle-java8-installer -y && \
sudo apt-get install oracle-java8-set-default

Or you may also use the following commands:

sudo add-apt-repository ppa:openjdk-r/ppa
sudo apt-get update
sudo apt-get install -y openjdk-8-jdk

## to install jdk 11 use below (choose to install either jdk 8 or 11 - both are not required )
	
sudo apt-get install -y openjdk-11-jdk

Run Commands on the Ubuntu VM Step 2


Step 3: Click Y for continuing the installation and press enter.

Run Commands on the Ubuntu VM Step 3


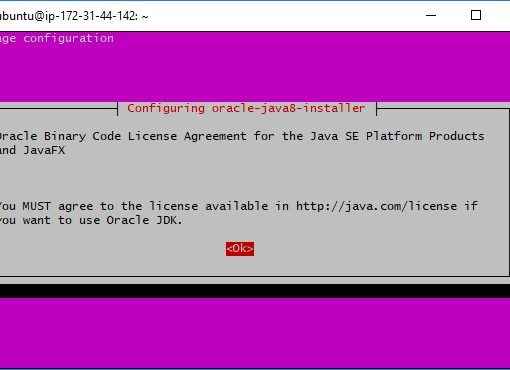
Step 4: Click Ok on the below popup.

Run Commands on the Ubuntu VM Step 4


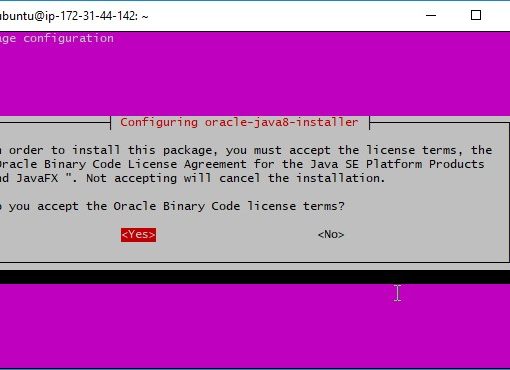
Step 5: Click Yes on the below screen.

Run Commands on the Ubuntu VM Step 5


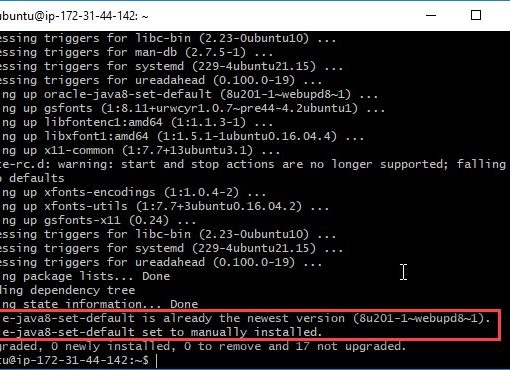
Step 6: Once jdk is installed, you will see the below screen.

Run Commands on the Ubuntu VM Step 6


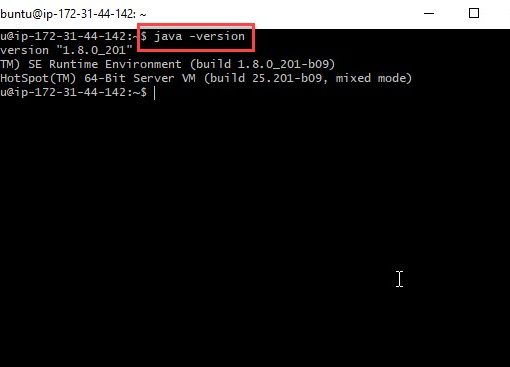
Step 7: Clear the screen by clear command, then, run java -version command to check the jdk version installed.

Run Commands on the Ubuntu VM Step 7


Step 8: Now, we will install Maven on the VM with the following command:

sudo apt-add-repository ppa:andrei-pozolotin/maven3 && \
sudo apt-get update && \
sudo apt-get install maven

Run Commands on the Ubuntu VM Step 8

Press Enter to continue.


Step 9: You will see the below screen. Now, the VM on AWS is ready with JDK and Maven installed.

Run Commands on the Ubuntu VM Step 9


Summary

Topics Covered
In this tutorial, we tried to decode the term – AWS.
We discussed the major products AWS offers and why we should learn AWS.
We learnt the steps to sign up for a free AWS account, how to create a VM instance and connect to it.

Road ahead
I hope you enjoyed reading this document.This basic tutorial on AWS will help all the professionals in their career paths to gain expertise on AWS by further exploration. AWS is a huge topic with so much to offer– one should definitely deep dive into it to understand it in more detail. This document will act as the first step in this insightful journey.

1 Comment

  1. Tripta

    one of the best tutorial to setup AWS Free tier account, It really helped me to setup my Ubuntu machine to practice DevOps tools.

    Reply

Submit a Comment

Your email address will not be published.