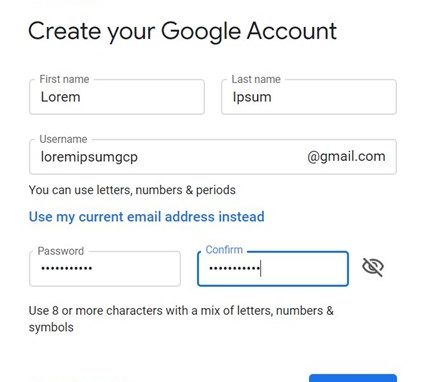
- Go to https://accounts.google.com/signup/v2/webcreateaccount?flowName=GlifWebSignIn&flo wEntry=SignUp to create a new gmail account
- You may also opt to use your existing Gmail account
- Fill in the details and click next
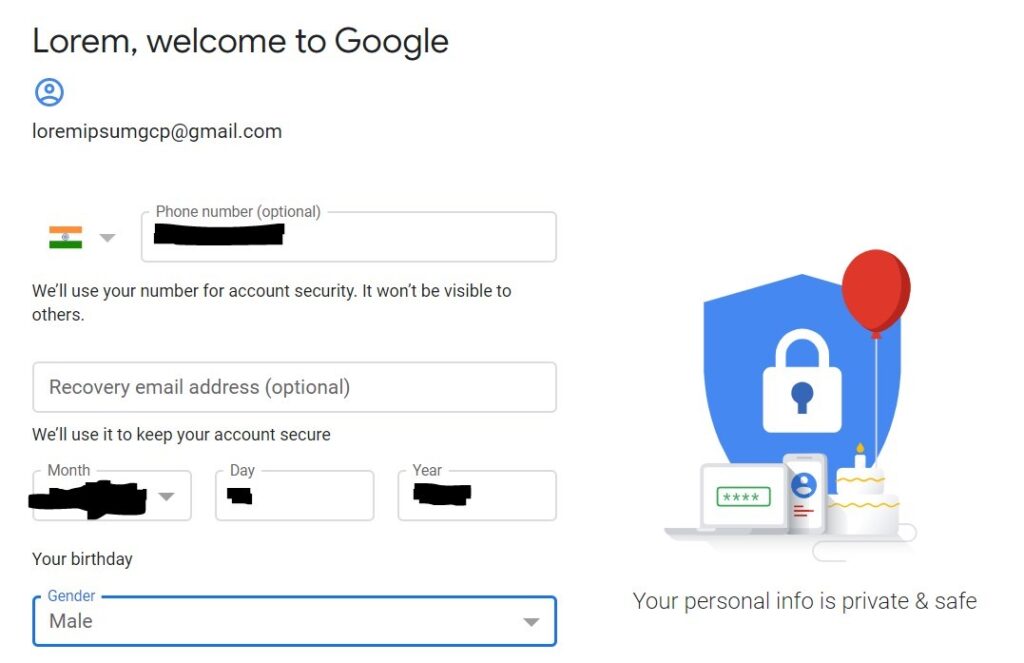
- Add your mobile number and verify using verification code
- Add details about your recovery address, data of birth and Gender
- Once account setup is complete – go to https://mail.google.com/mail/u/0/
- Login as your new account
- Click Next
- In the next page, click – Yes, I’m in
- In the next page, agree to the T&C
- On your browser (preferably chrome), navigate to https://console.cloud.google.com
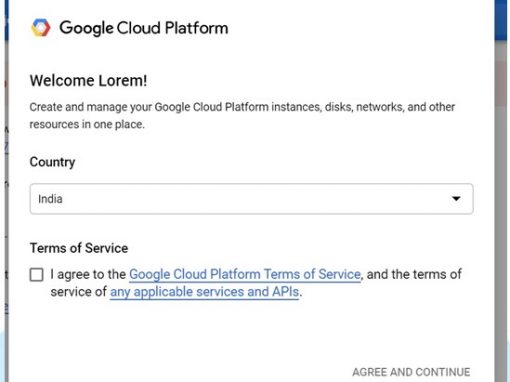
- Agree the terms and conditions and you now have a free tier account for GCP
- On top of your screen you will see the link to enable billing

- Click on the Activate Button to go to the next page
- In the next page – select your country and Agree to the T&C and click Continue
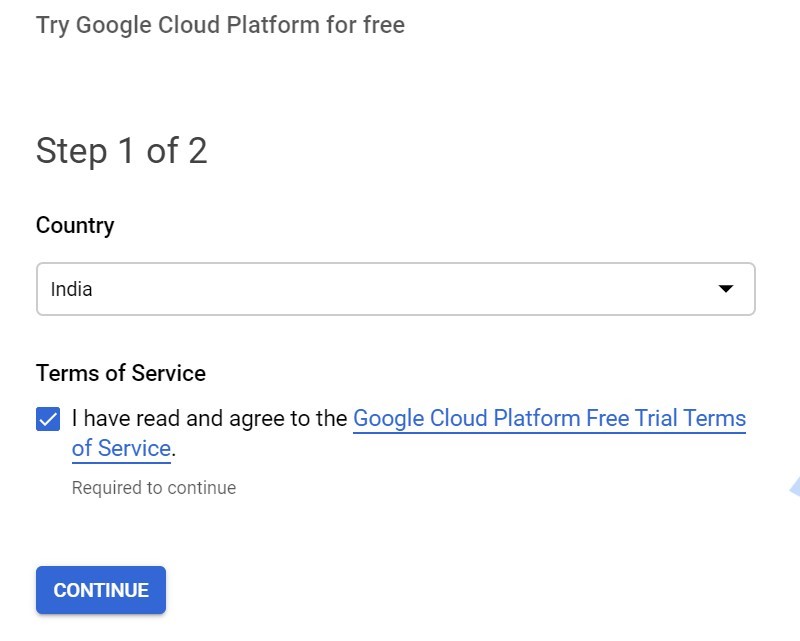
In the next page –
- Change account type to – Individual
- Select your Tax status type
- Add your Address
- Add details about your registered ID like SSN/PAN etc
- Add credit card details
NOTE – It is YOUR responsibility to ensure that you shut down your GCP resources so that you dont incur unnecessary charges. Google provides you with an evaluation credit of $300, upto which you will not be charged. Once you cross the limit of $300 Google will charge you for the resources that you utilize. All cloud providers has the PAY AS YOU GO model, which ensures that you are charged only for the resources that you are utilizing.
NOTE – Ensure that your card supports auto debit. I have seen a few instances where debit cards were rejected as they dont support auto debit.
- Once done – click Start My Free Trial
- The top blue menu bar has an option of Select a project
![]()
- Click on Select a project dropdown
- By default a new project would be created
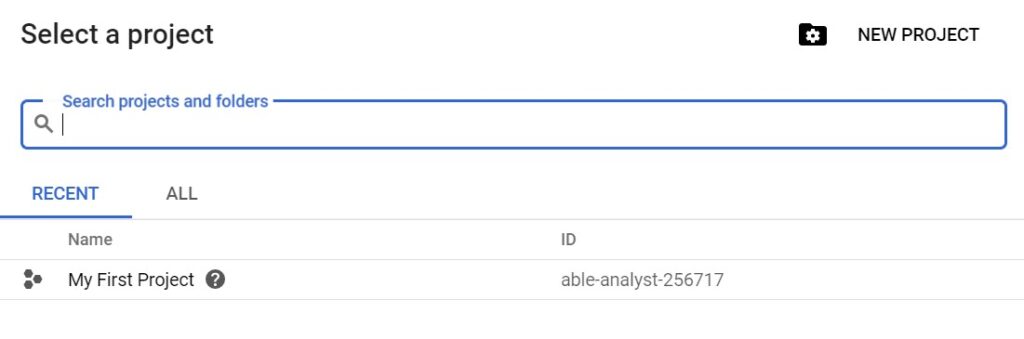
- Select the project My first project and you are good to go.
NOTE – Google Cloud Projects provides a good way to bundle all your resources together. Which means that deleting the project entirely will delete all the resources inside it. This is really helpful when you dont remember what resources have been created and what resources are getting billed. Deleting the project completely will ensure that you are not billed for anything.
- Once after setting project successfully & enabled the billing for it.
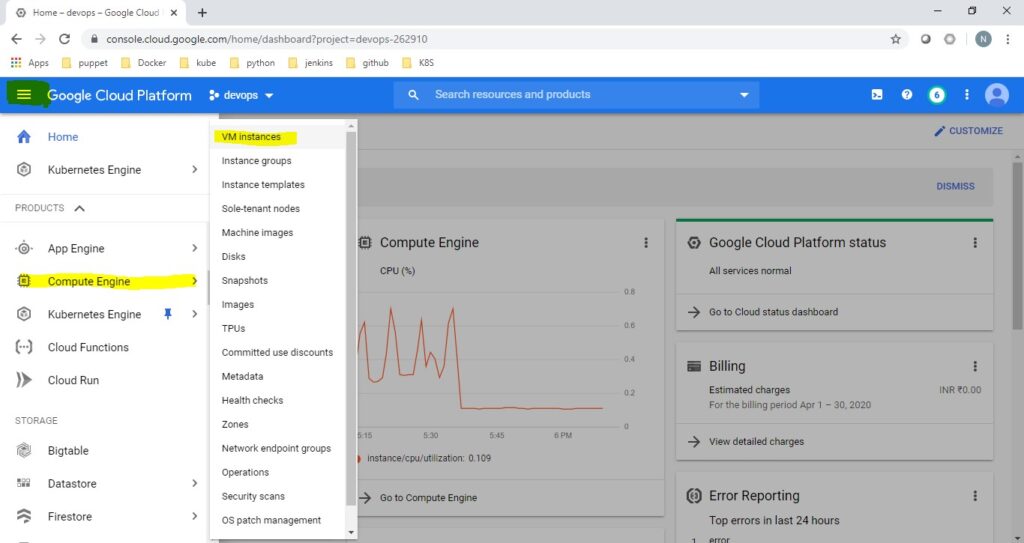
- On your google cloud home page, top left corner click 3dash symbol as shown below
- You will see various services offered by google.
- Now scroll down list of services until you see “Compute Engine” then click on it
- It will pop up with various other services under compute engine as show below
- Now click on “VM Instances”
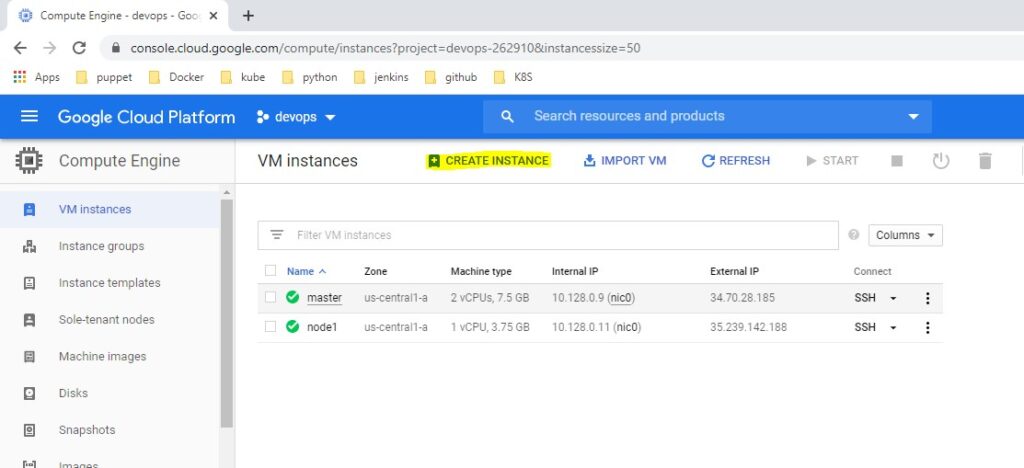
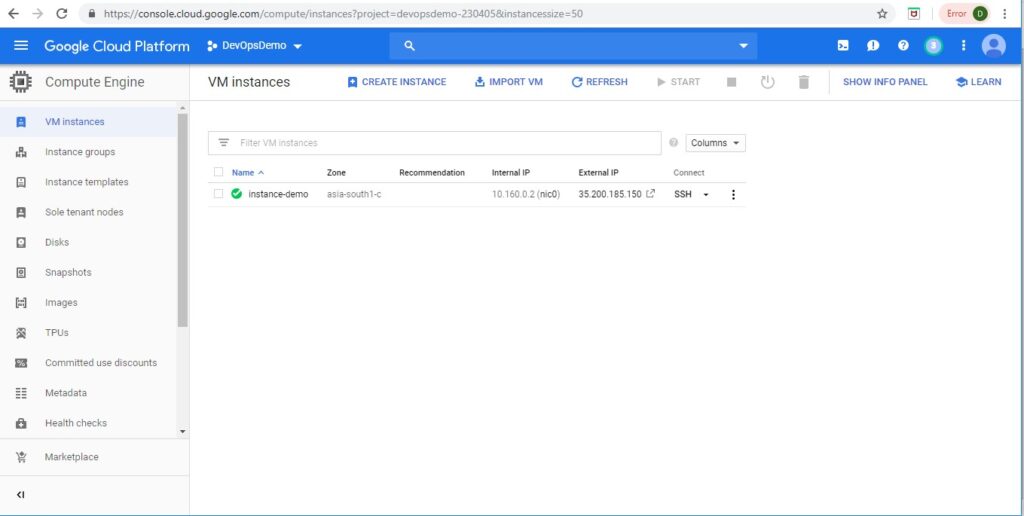
- After clicking on VM Instances it will show below screen
- Now Click on CREATE INSTANCE above to create a new instance.
After clicking on “CREATE INSTANCE” it will show below screen
- Name: “type any name” (ex: machine1)
- Series: N1 (do not change this)
- Machine type: (choose the appropriate capacity as per the requirement)
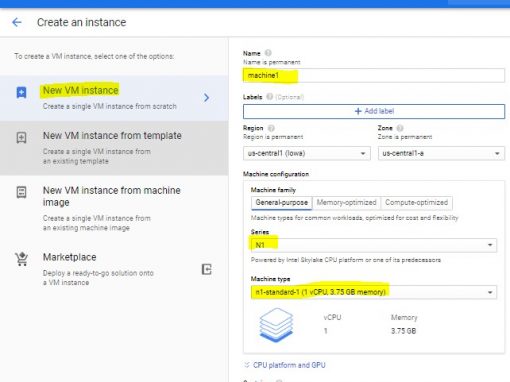
Scroll down for other options such As:
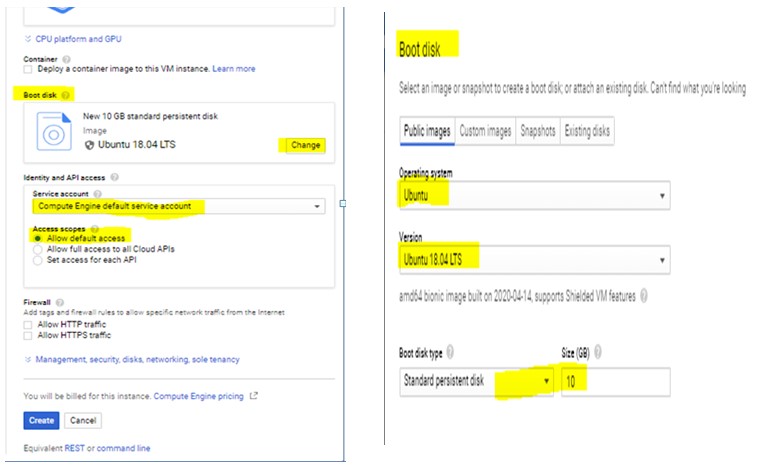
- Boot disk: click on change (now you will see other screen like below right side)
- Operation system: choose Ubuntu
- Version: Ubuntu 18.04LTS
- Boot disk type: leave the default
- Size: leave the default
Then click on “select” at the bottom
Now you should see as below left side Boot disk section shows Ubuntu
Identity and API access Section:
- Service account: Compute Engine default service account (default)
- Access scopes: Allow default access (default)
Now click on “create” at the bottom.
- Once we click on create you will see below screen.
- The machine will get ready in couple of minutes & you will see as below highlighted.
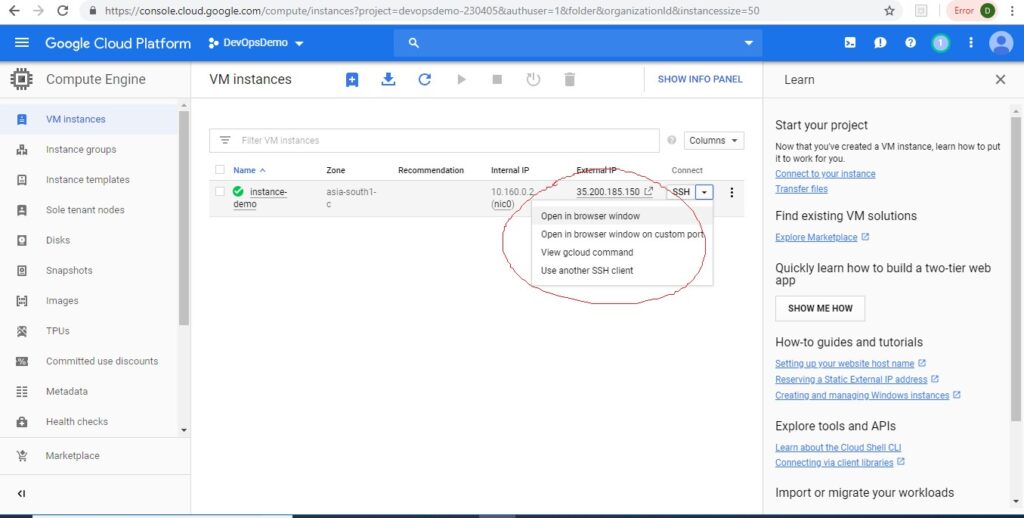
- To login to the machine click on SSH – open in browser window.
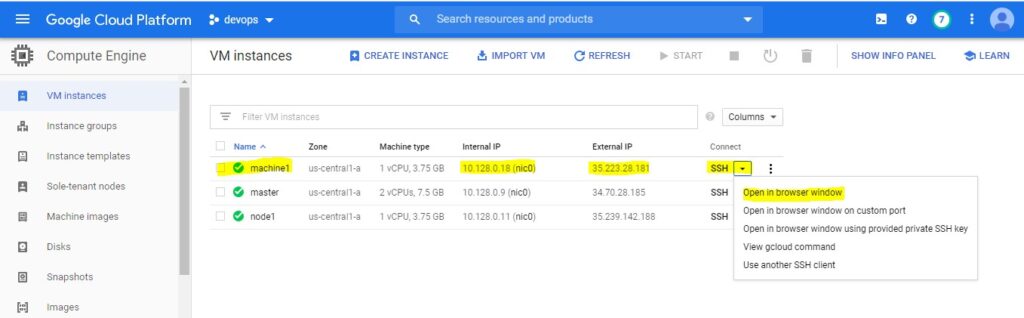
- To create more VMs, repeat same process
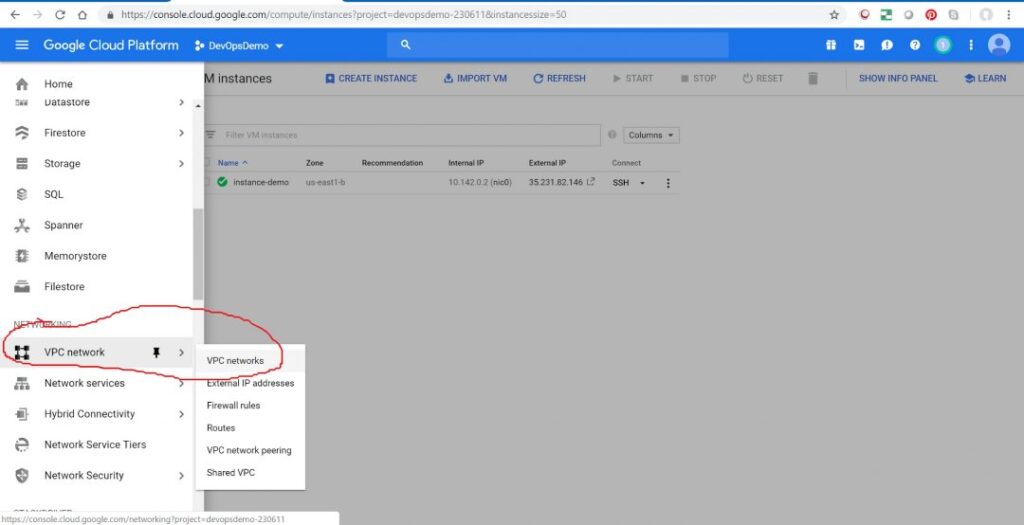
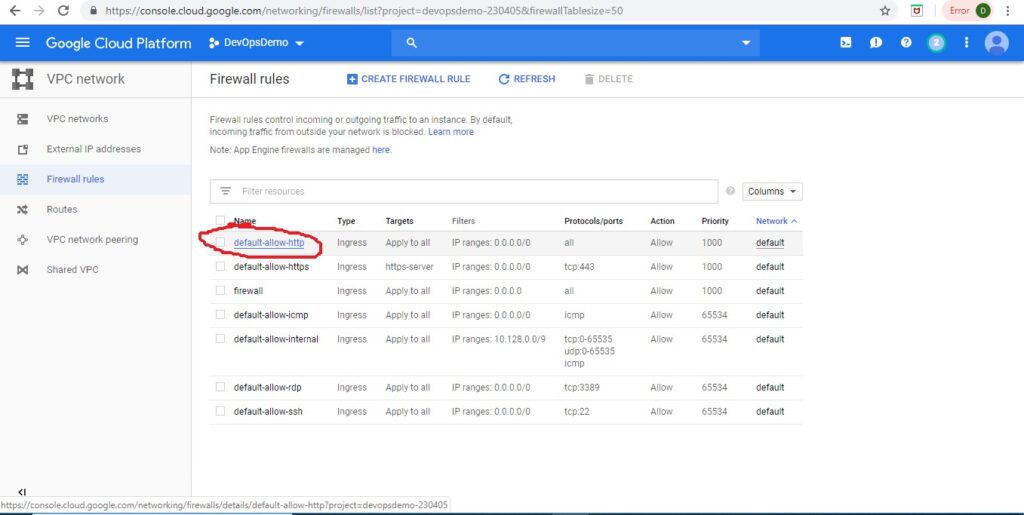
Step 1: On the navigation menu on the left, scroll down and go to Networking section -> VPC network – > VPC networks.
Step 2: Go to firewall details and click on the default-allow-http.
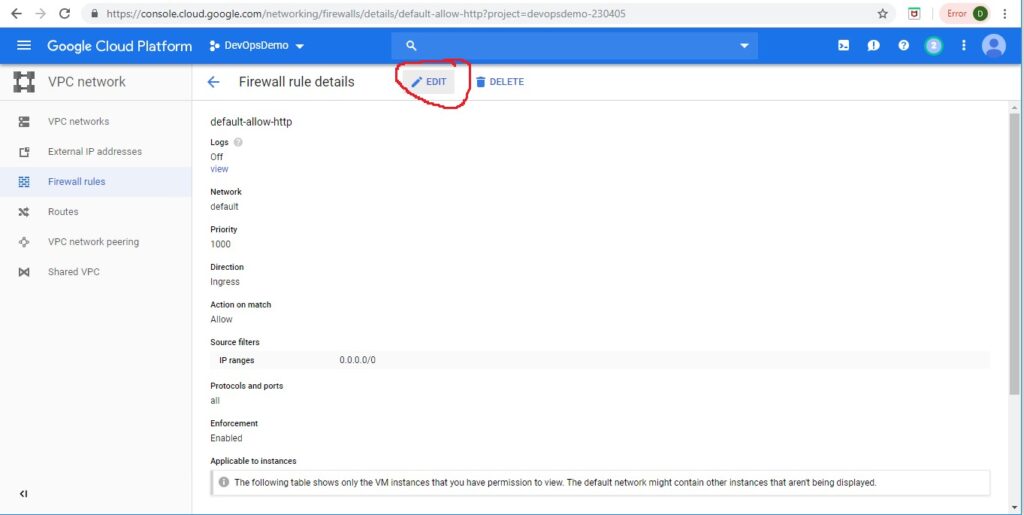
Step 3: Click on the Edit link.
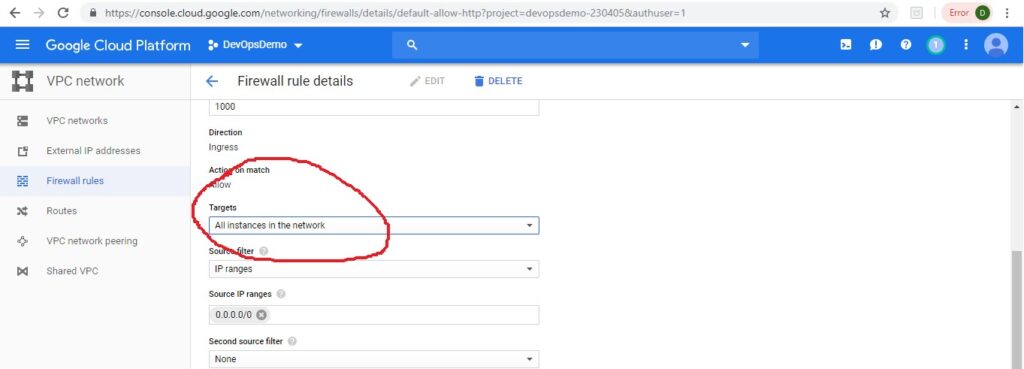
Step 4: Choose All instances in the network from the Targets dropdown.
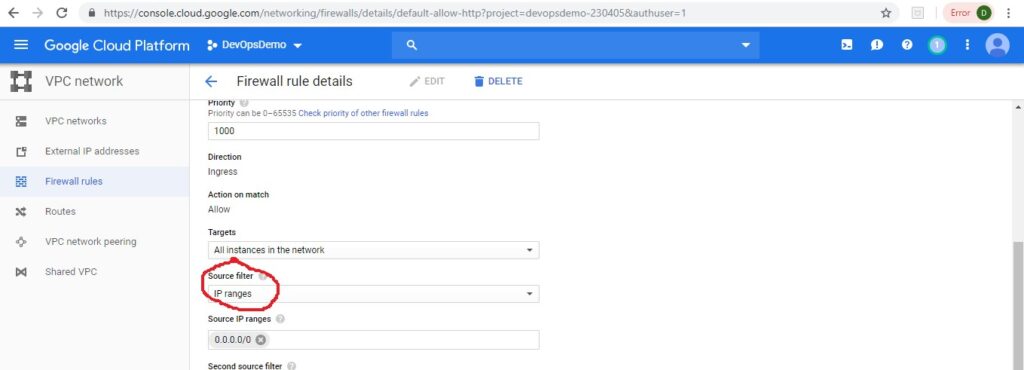
Step 5: Source filter should be selected to IP ranges.
Step 6: Select Allow all from Protocols and ports and click save.

Step 7: Once the rule is saved, you will view this screen.

Step 1: Go to Compute Engine->VM instances from the navigation menu. You will see the VM instance we created earlier.
Step 2: Now, select Open in browser window from the Connect dropdown.
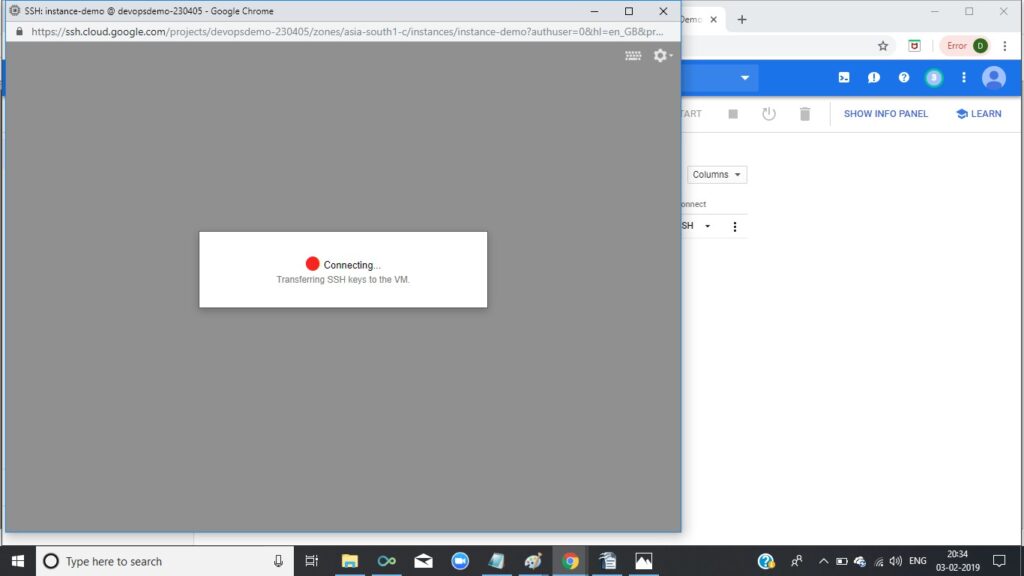
Step 3: You will see a new window like the one below. It may take a few seconds to connect to the VM.
Step 4: Once the connection is done, this screen opens.
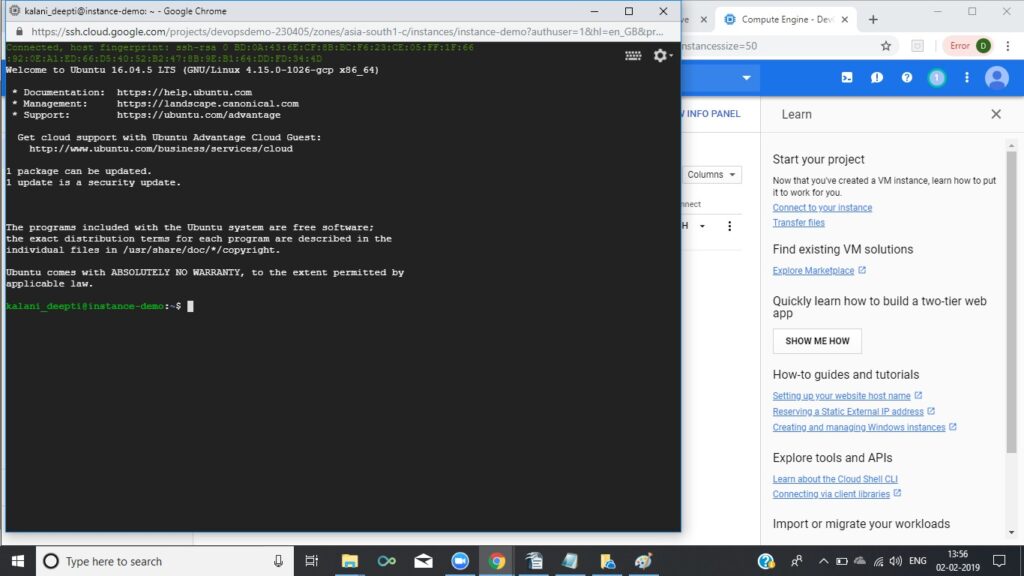
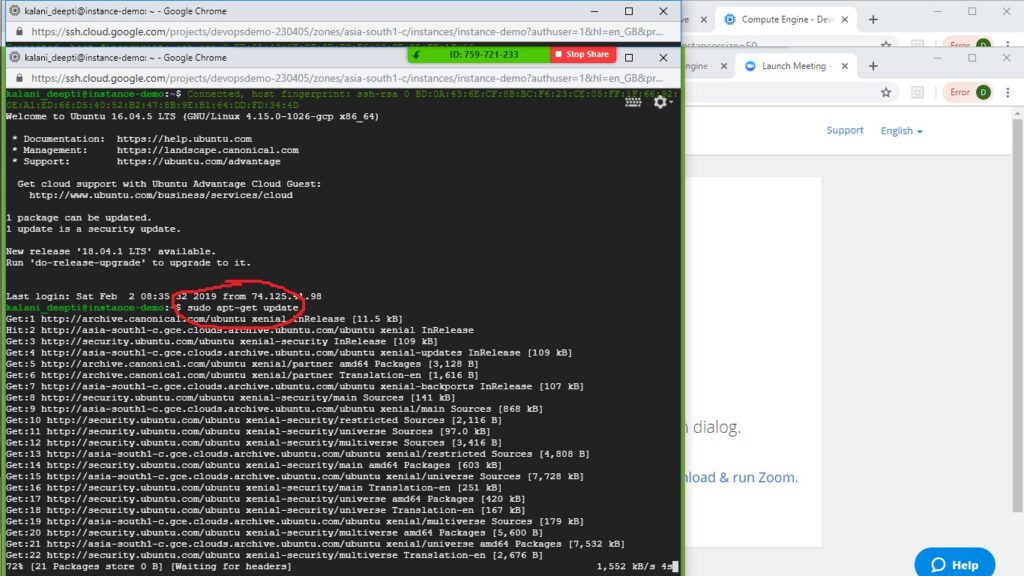
Step 5: Now, we will run the command sudo apt-get update.
Sudo is the command to get admin rights temporarily on the VM. We will get the software package update by executing the above command.
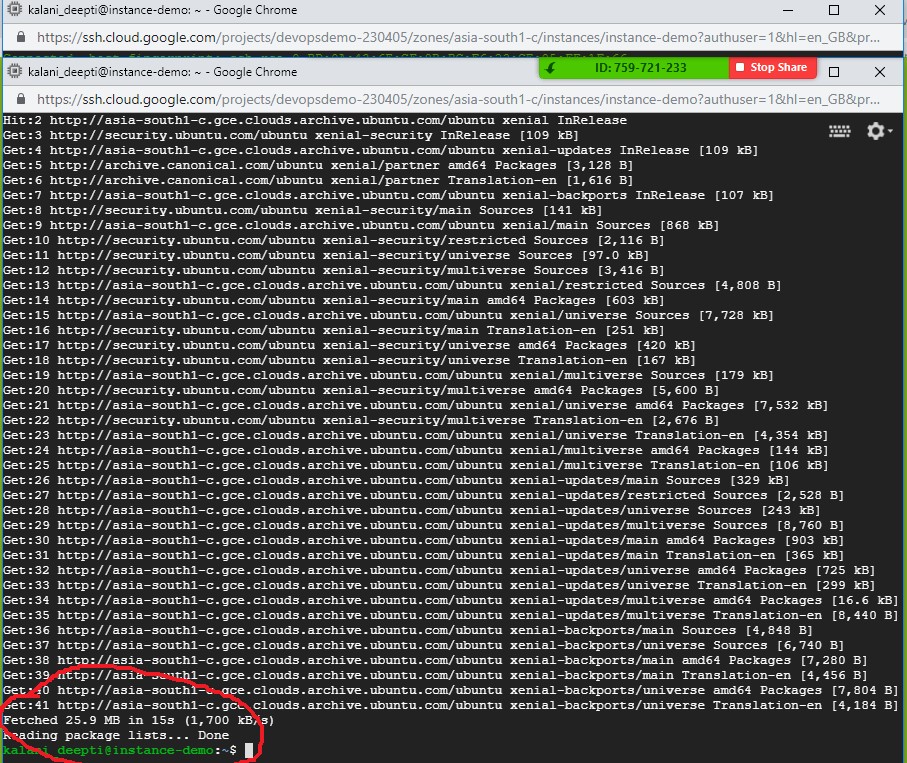
Step 6: Once the command is executed and update completes, you should view the below screen.
Step 7: Now, we will install JDK 8 on the VM with the command:

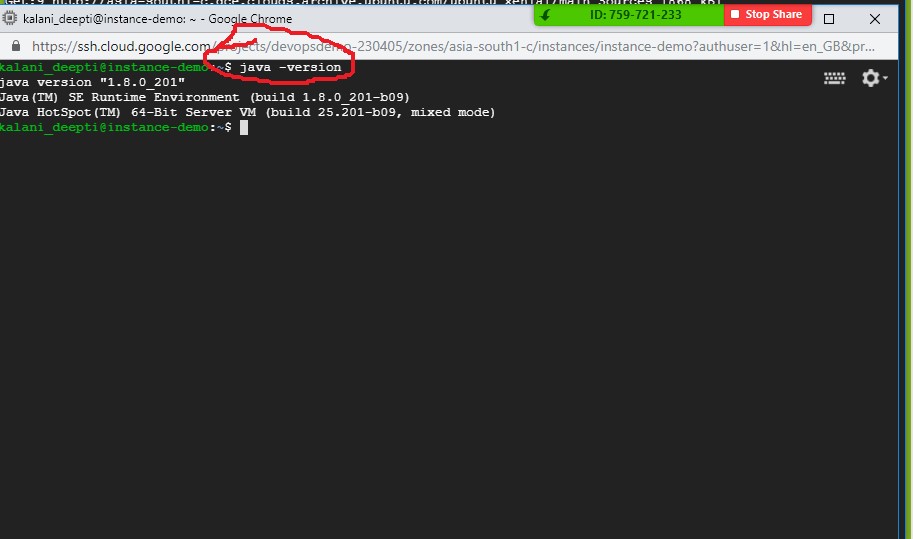
Step 8: Once the command is executed, we run the java -version command to check the version of JDK installed.
Step 9: Now, we will install Maven on the VM with the following command:

Now, the VM is ready with JDK and Maven installed.
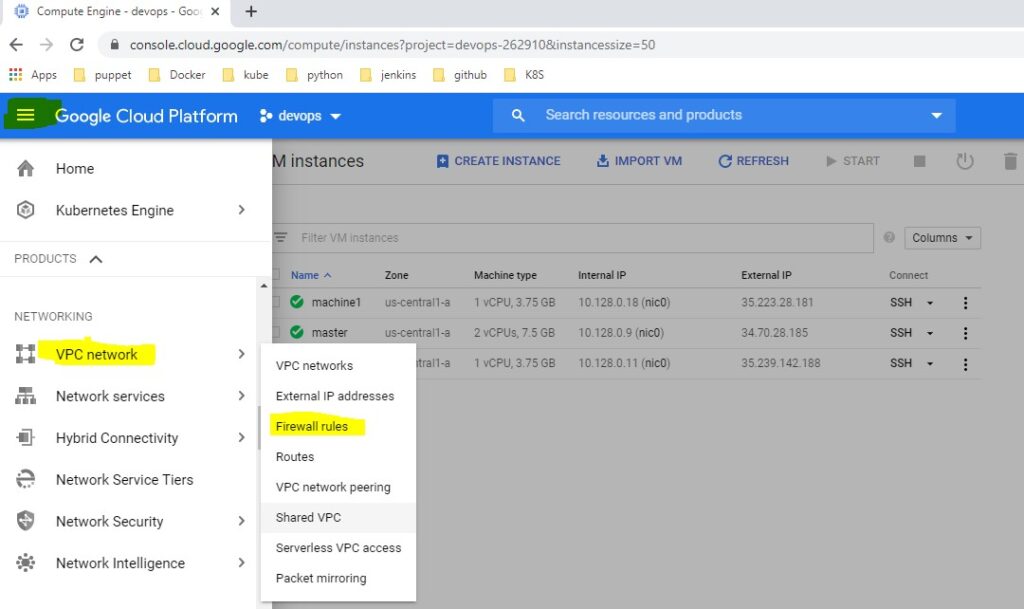
- On your google cloud home page, top left corner click 3dash symbol as shown below,
- You will see various services offered by google.
- Now scroll down list of services until you see “VPC network” then click on it
- It will pop up with various other services under compute engine as show below
- Now click on “Firewall rules”
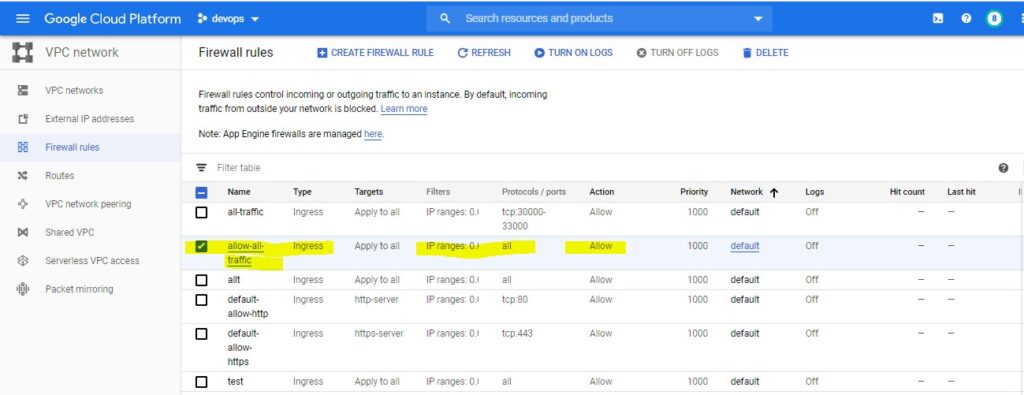
- After clicking on Firewall rules it will show below screen
- Now Click on CREATE FIREWALL RULE above to create a New rule.

- Now you will see below screen follow the setting as highlighted in screenshot below
- And click on Create Option at the bottom.
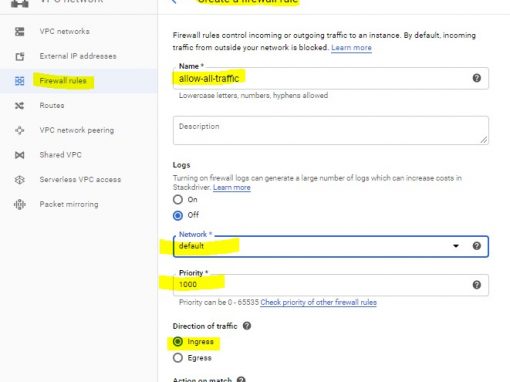
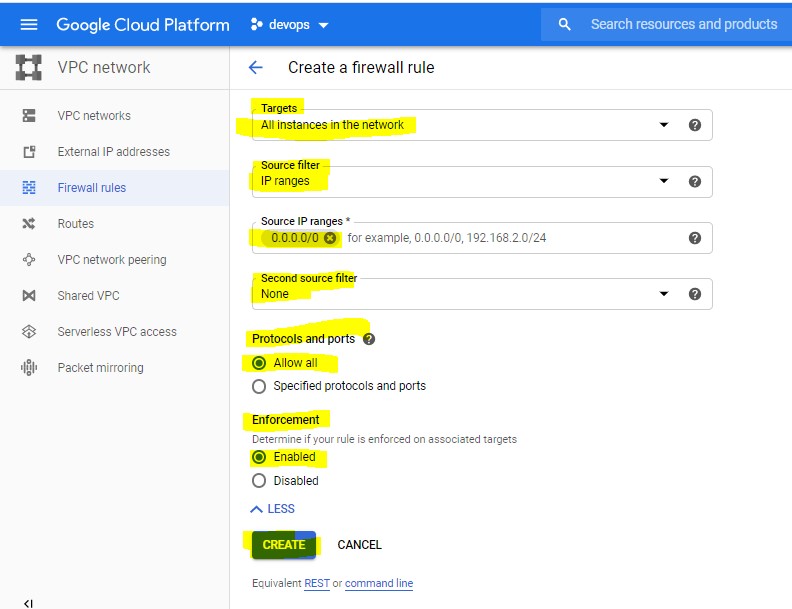
Now you will see below screen, this setting will enable the all traffic to all VM instances in the default network.