Git Tutorials – Git versus GitHub
Git versus GitHub
| GIT | GITHUB |
| A distributed VCS which tracks changes to source code over time. | A web-based hosting service for Git repository to bring teams together. |
| A command-line tool that requires an interface to interact with the world. | A graphical interface and a development platform created for millions of developers. |
| It creates a local repository to track changes locally rather than store them on a centralized server. | It is open-source which means code is stored in a centralized server and is accessible to everybody. |
| It stores and catalogs changes in code in a repository. | It provides a platform as a collaborative effort to bring teams together. |
| Git can work without GitHub as other web-based Git repositories are also available. | GitHub is the most popular Git server but there are other alternatives available such as GitLab and BitBucket. |
 Workshop on Certified DevOps
Foundation
Workshop on Certified DevOps
Foundation Workshop on Certified DevOps
Professional
Workshop on Certified DevOps
Professional Get DevOps
Certified
Get DevOps
CertifiedCreate an Account on GitHub
GitHub is a social network of source codes where you can host all
the projects you have made online with a feature to make them
private or public.
Each hosted project can have multiple files and is called a
repository.
- The power of GitHub is that it promotes collaboration. If I have a repository on my GitHub account, any one can just clone it (Cloning creates an exact copy of project on local machine i.e your laptop ) and anyone can make changes to the local copy of the existing source code.
- Now, after making the updates, if you would like to share what you have changed with the owner of the project, you will use PULL REQUESTS which means that you are going to ask the project owner to go through the new code and your changes and finally decide if it is good enough to be merged with the master copy (changes you made would be merged with the existing code to create a new version).
- Lets see how we can do these things by creating a GitHub account.
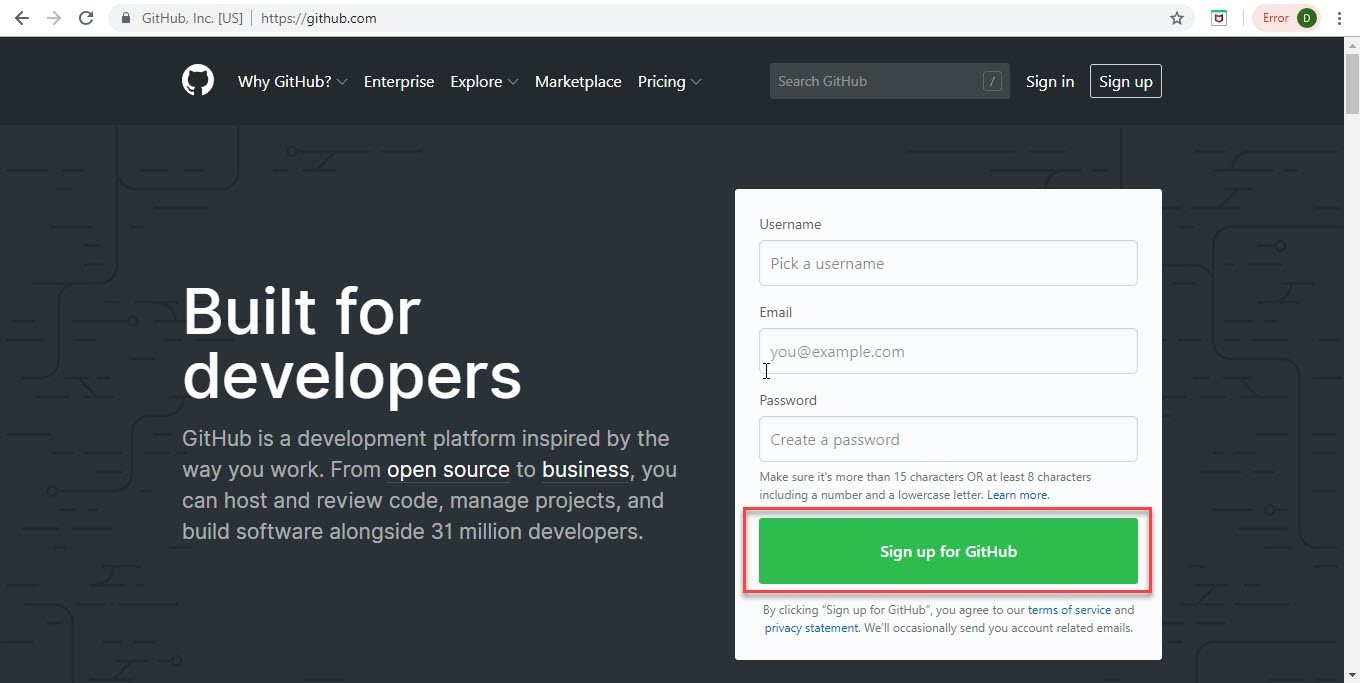
Step 1: Go to https://github.com/. Enter the username and other details and click on ‘Sign up for GitHub’.
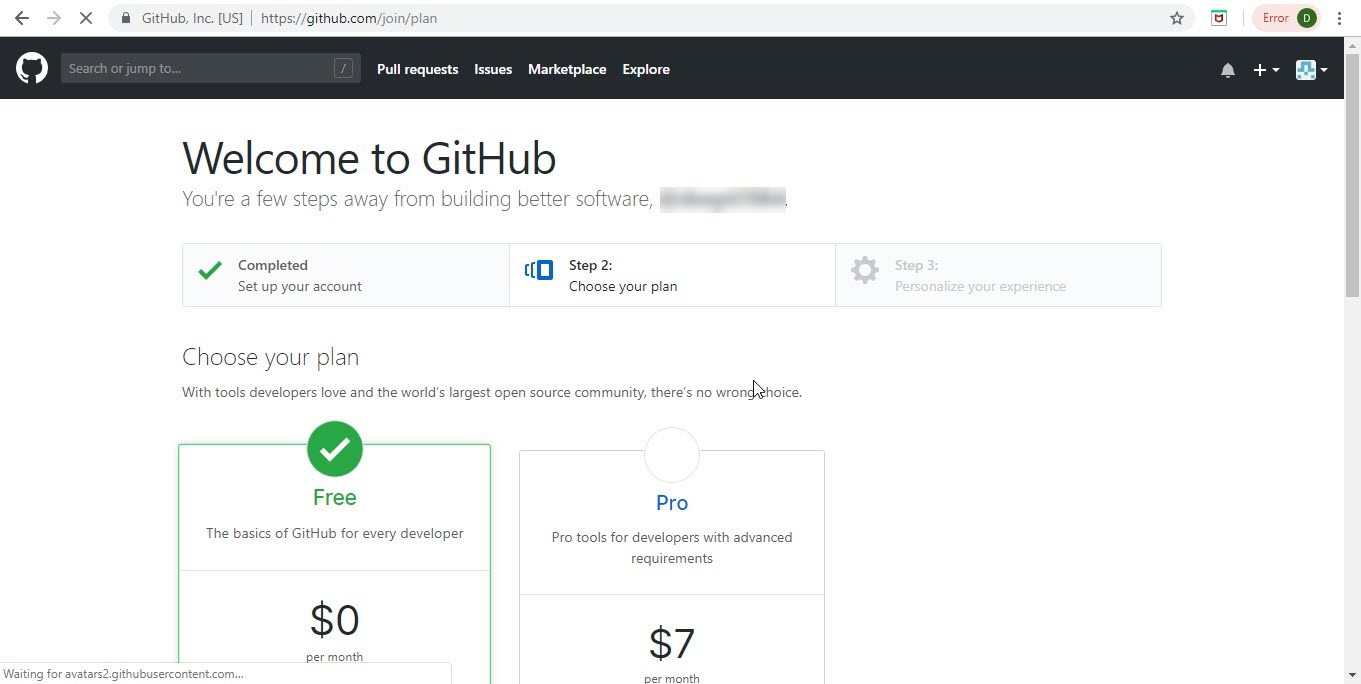
Step 2: You view this Welcome to GitHub screen. By
default, Free plan is chosen.
Let the default selection remain.
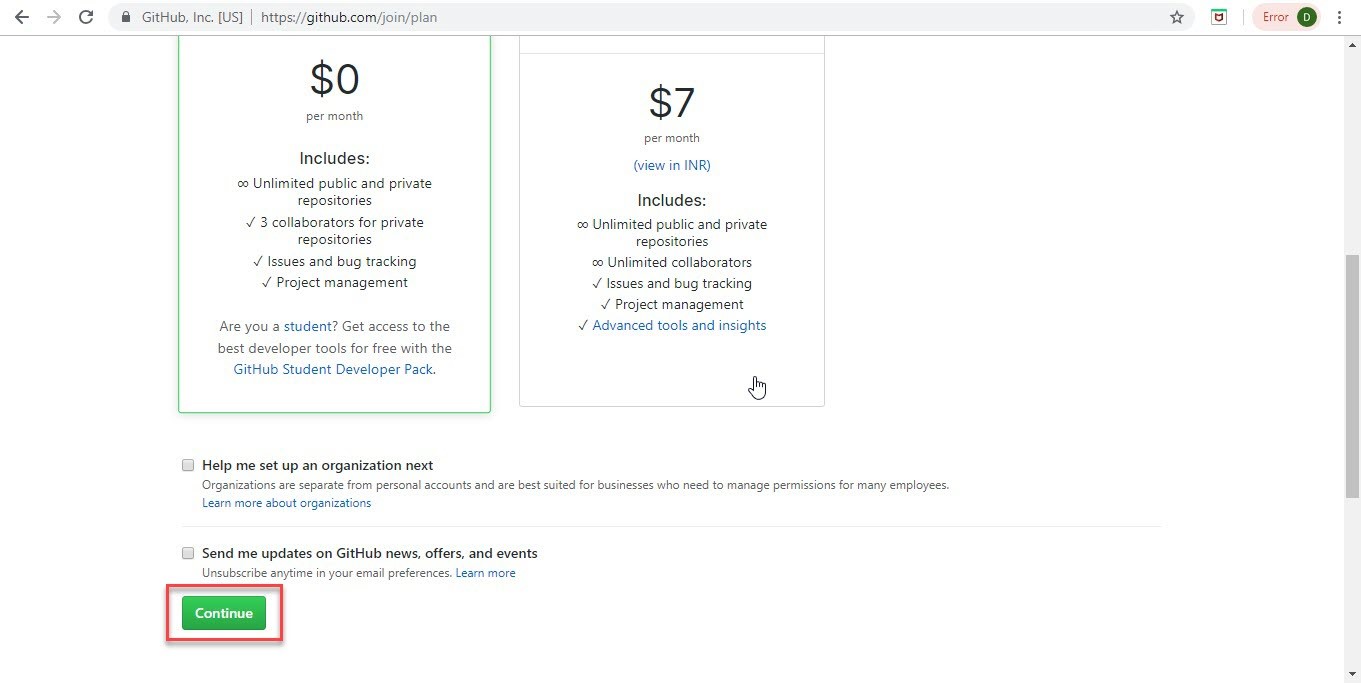
Step 3: Ensure the free plan option and click Continue.
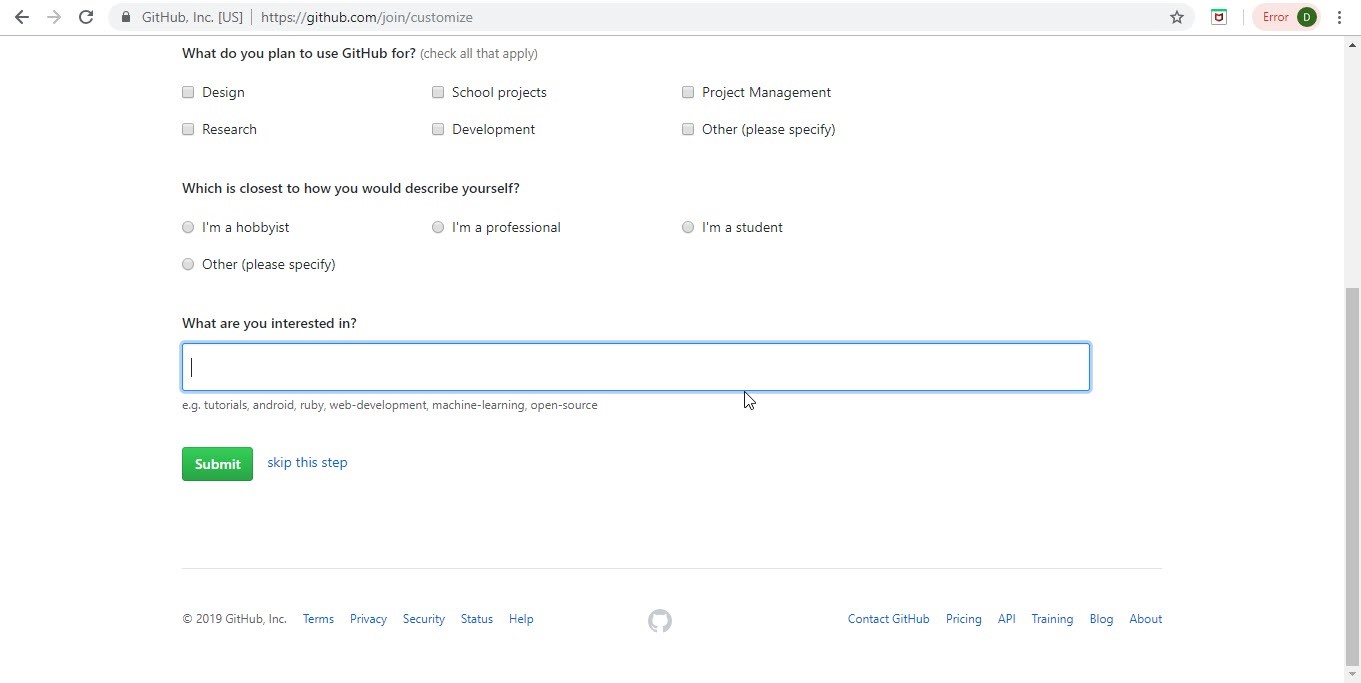
Step 4: You can Skip this step or fill the details and Submit.
Step 5: A verification email would be sent to the email id mentioned.
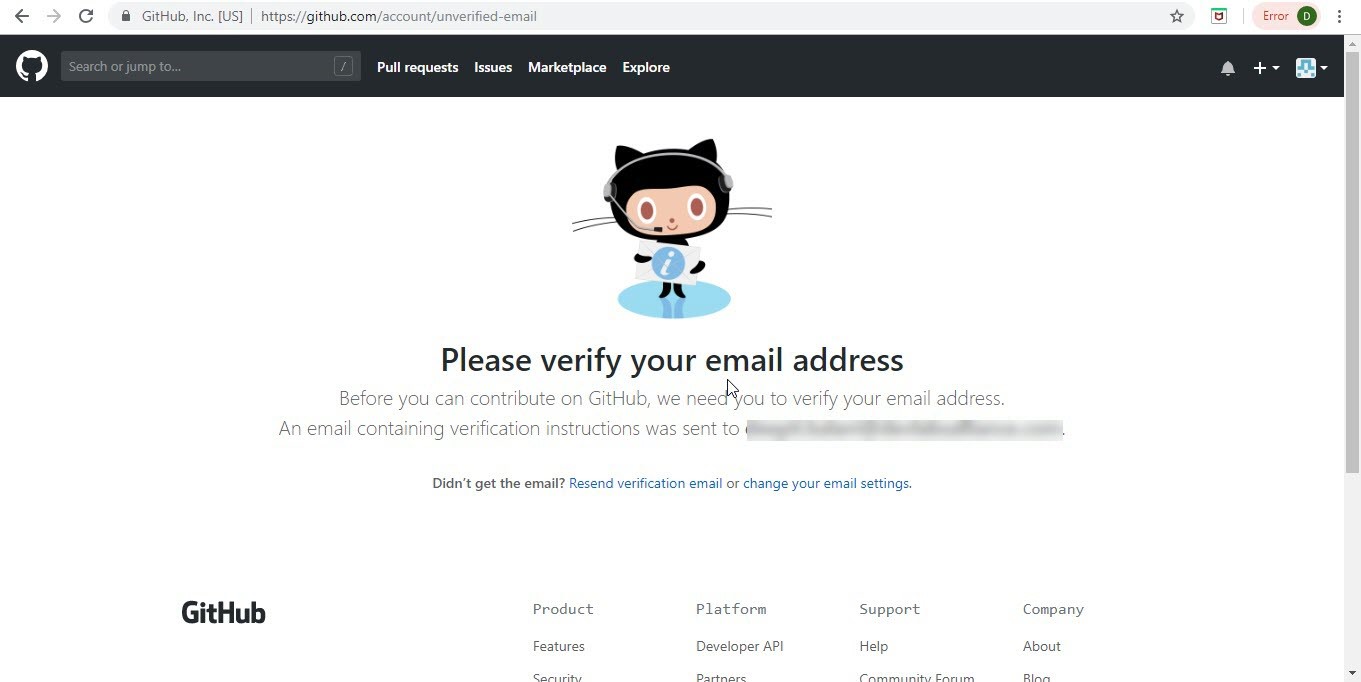
Please click on the verification link.
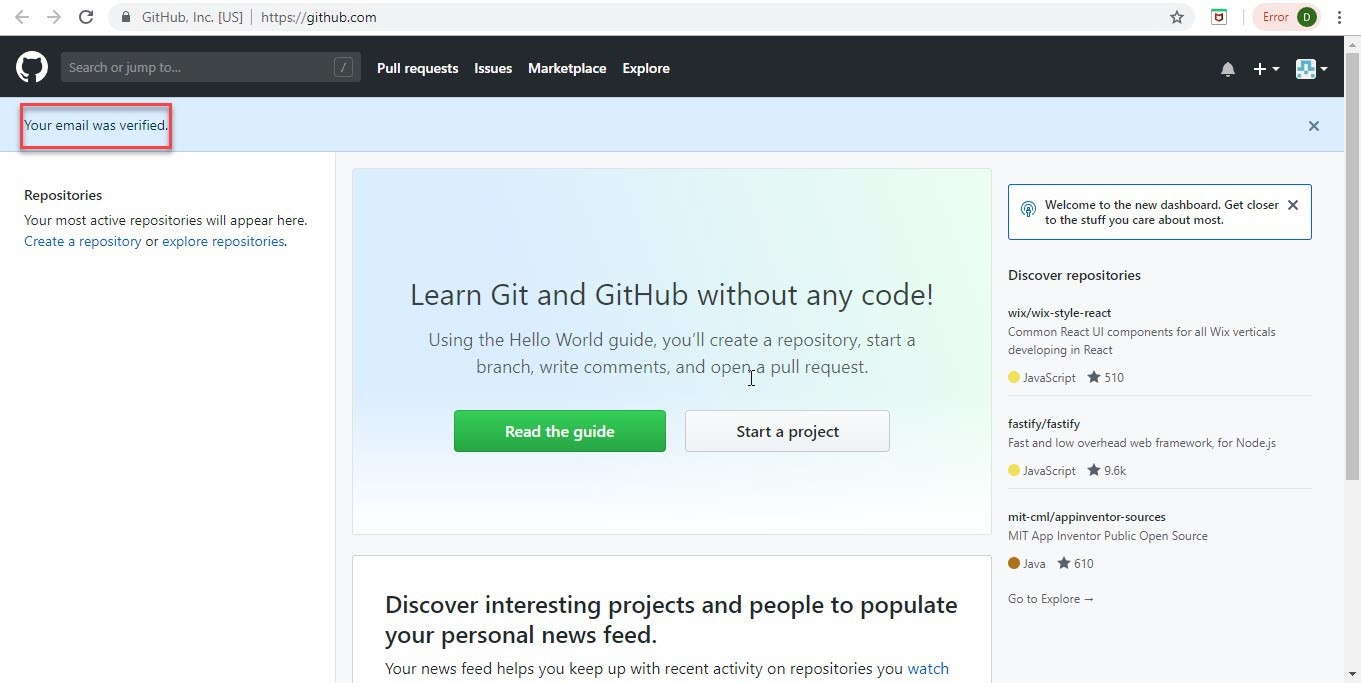
Step 6: Once the verification completes, you will
view the welcome screen of Github.
Click on Start a project.
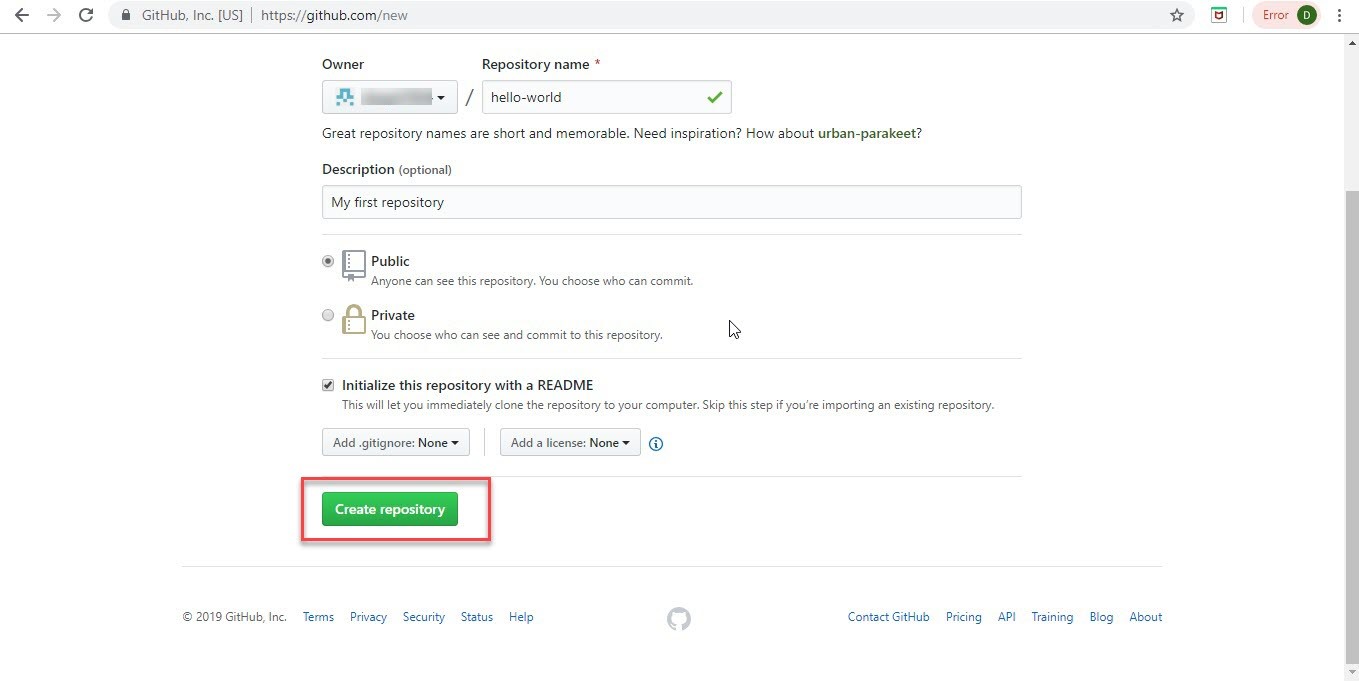
Step 7: You will view this screen to Create a new repository. Enter the Name and other details and click Initialize this repository with a README checkbox.

Step 8: Click on Create repository button.
Step 9: hello-world repository is created with the description ‘My first repository’. You will view this screen with the details of the name and description you entered.
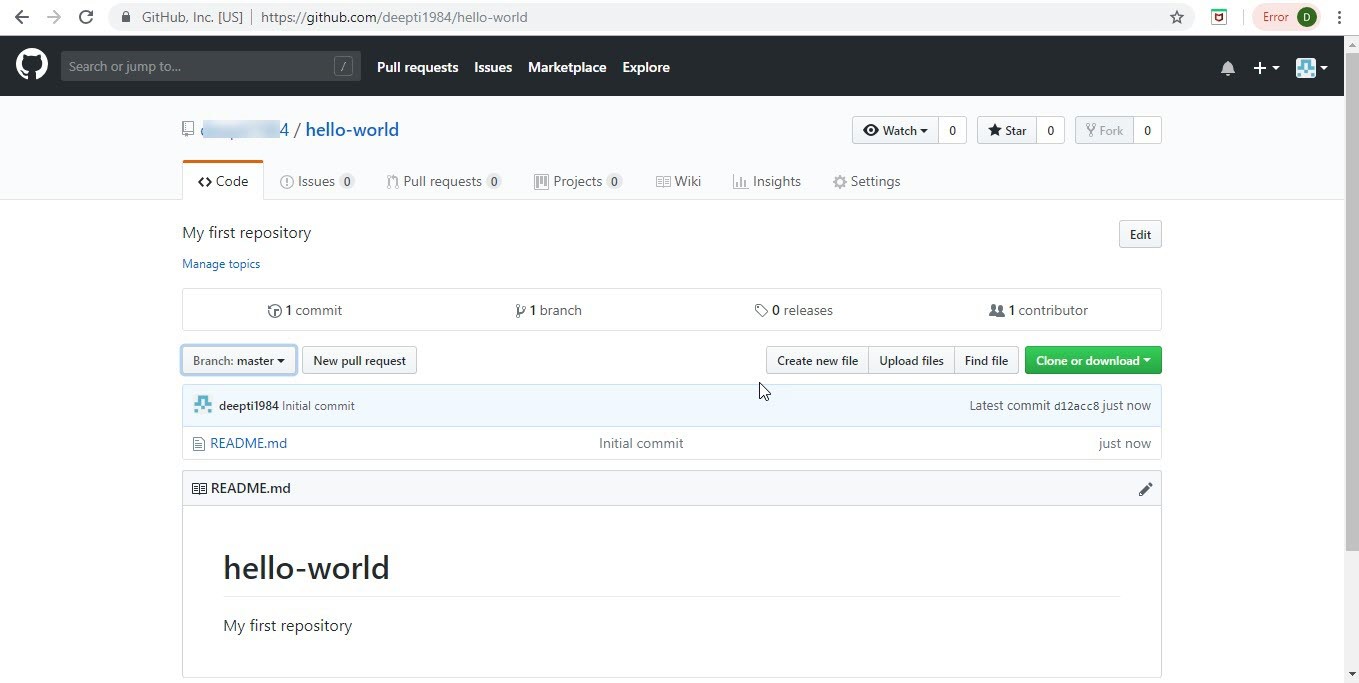
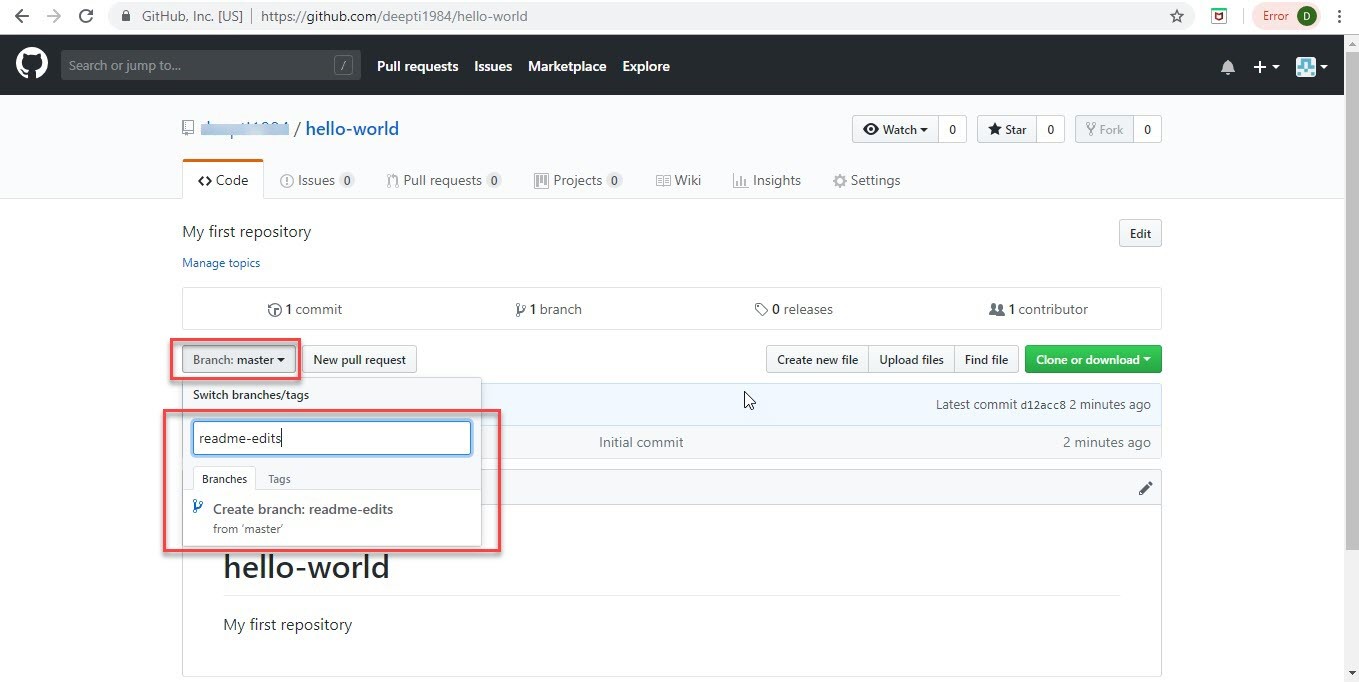
Step 10: Click on the dropdown ‘Branch: master’ and you will get aa textbox to enter a name for your new branch. Then, click on Create branch : branch name.
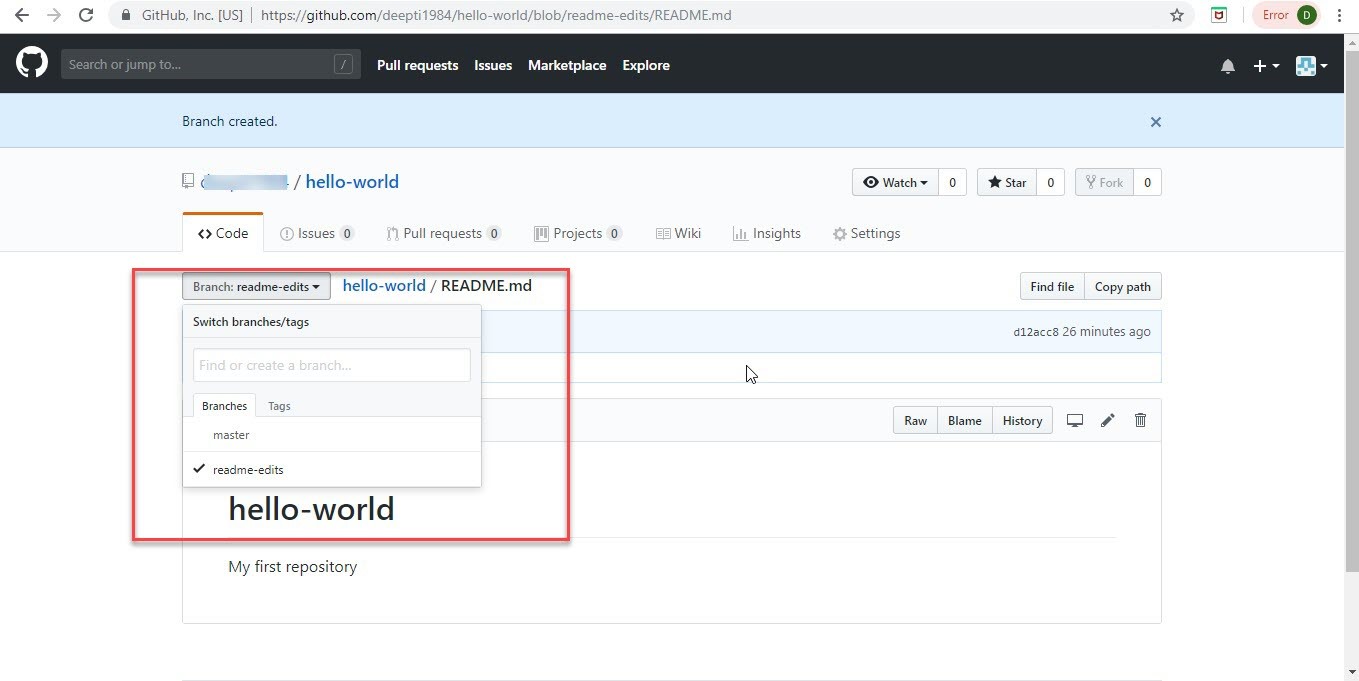
Step 11: Once the branch is created, you will see the two branches – master and your branch when you click on the branch dropdown.
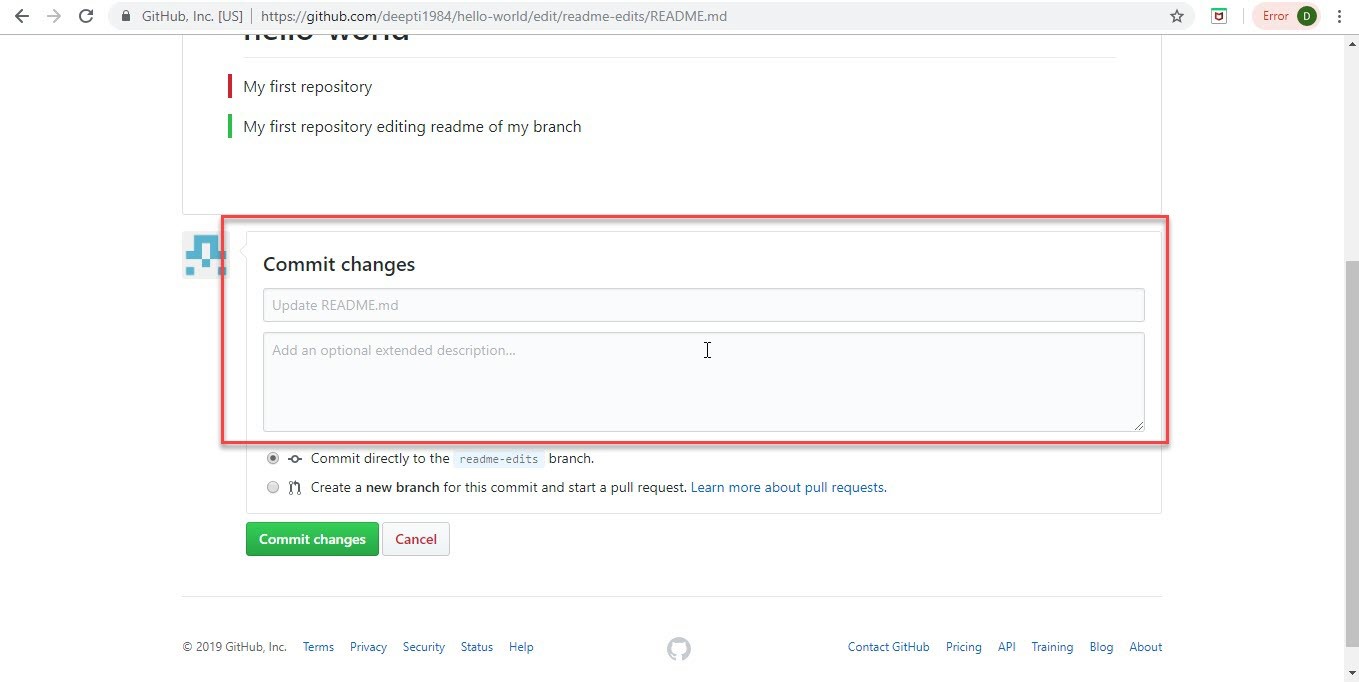
Step 12: Now, you can edit the readme file of this branch and click on Commit changes.
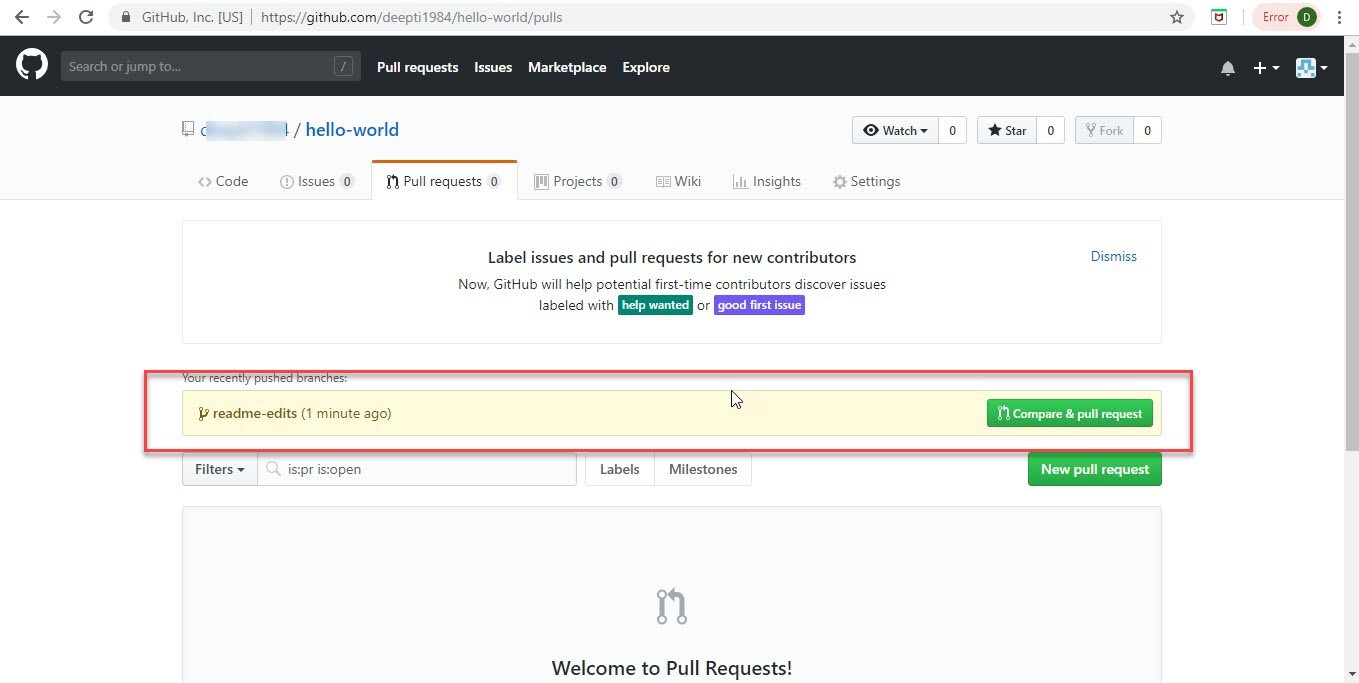
Step 13: You will see the below screen where you can create a pull request for the change you made to be checked and merged with the master. Click on Compare and pull request button.
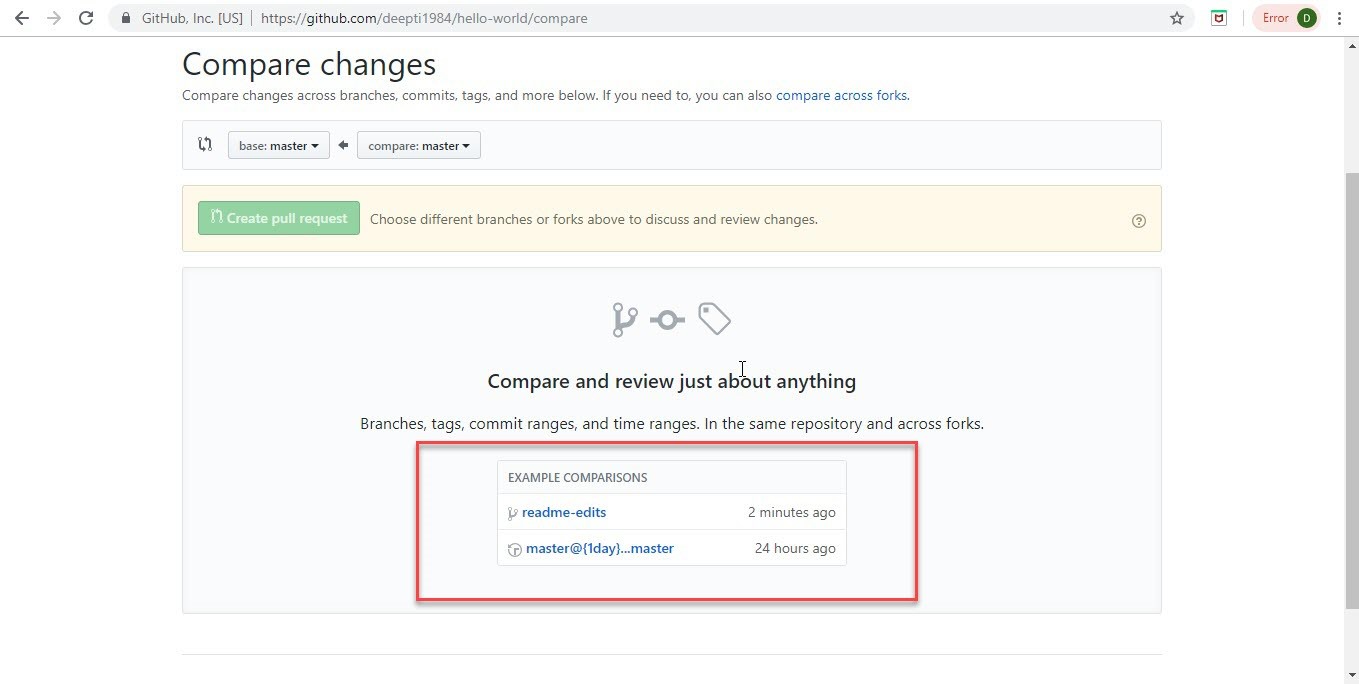
Step 14: You will reach the Compare changes screen. Click on Create pull request button.
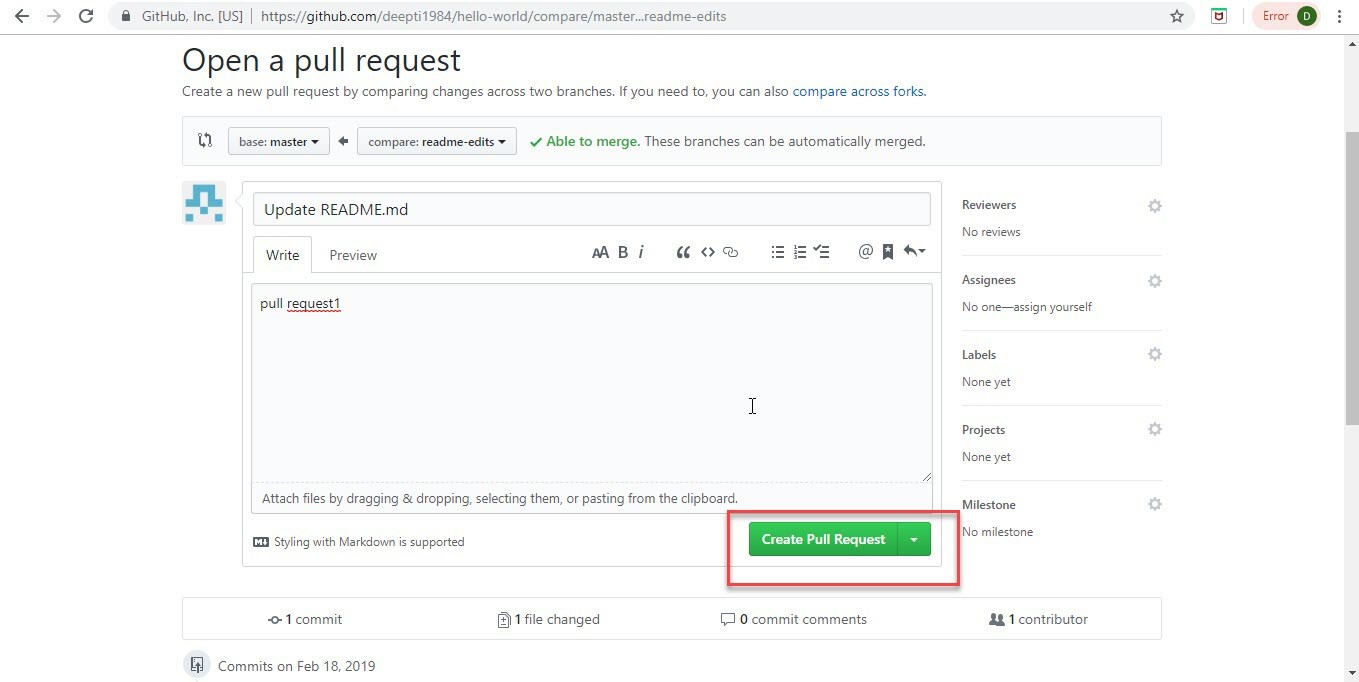
Step 15: You will view this ‘Open a pull request’
screen. Update the description and click.
Create Pull request.
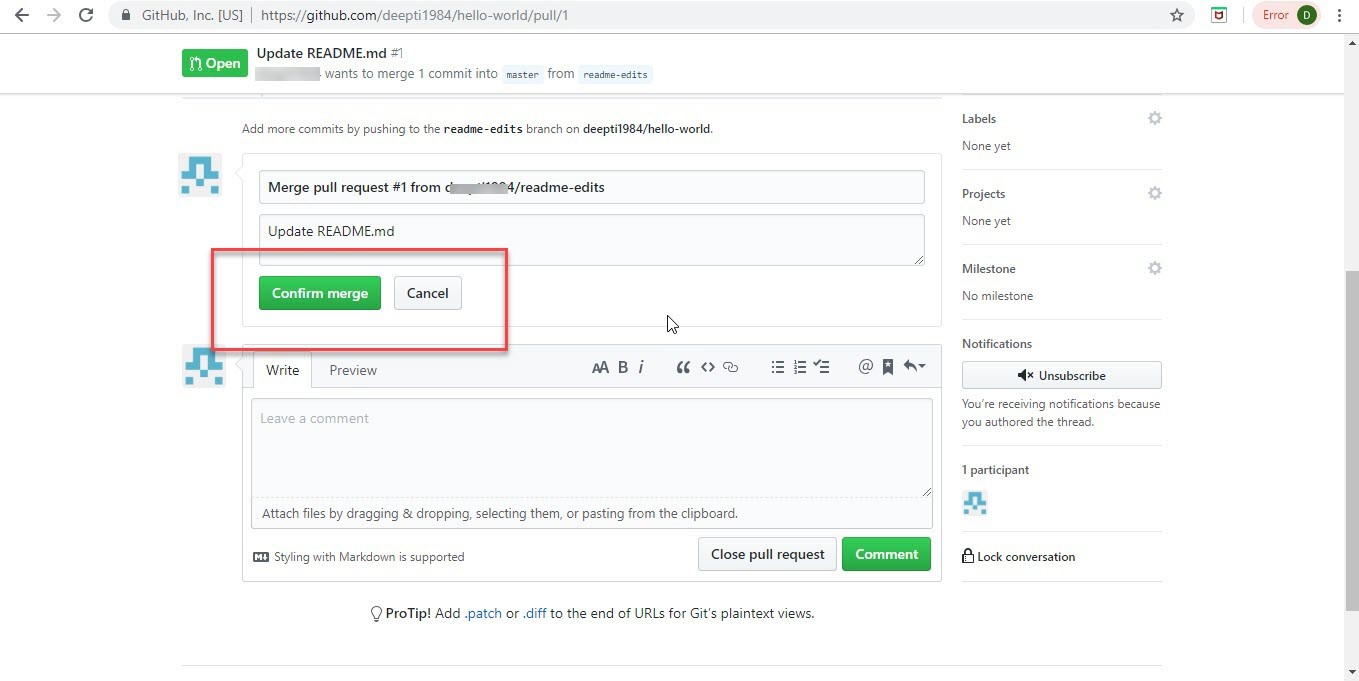
Step 16: The below screen shows the conflicts if any, and then, you can merge the changes by clicking on Merge pull request button.

Step 17: Click on Confirm merge.
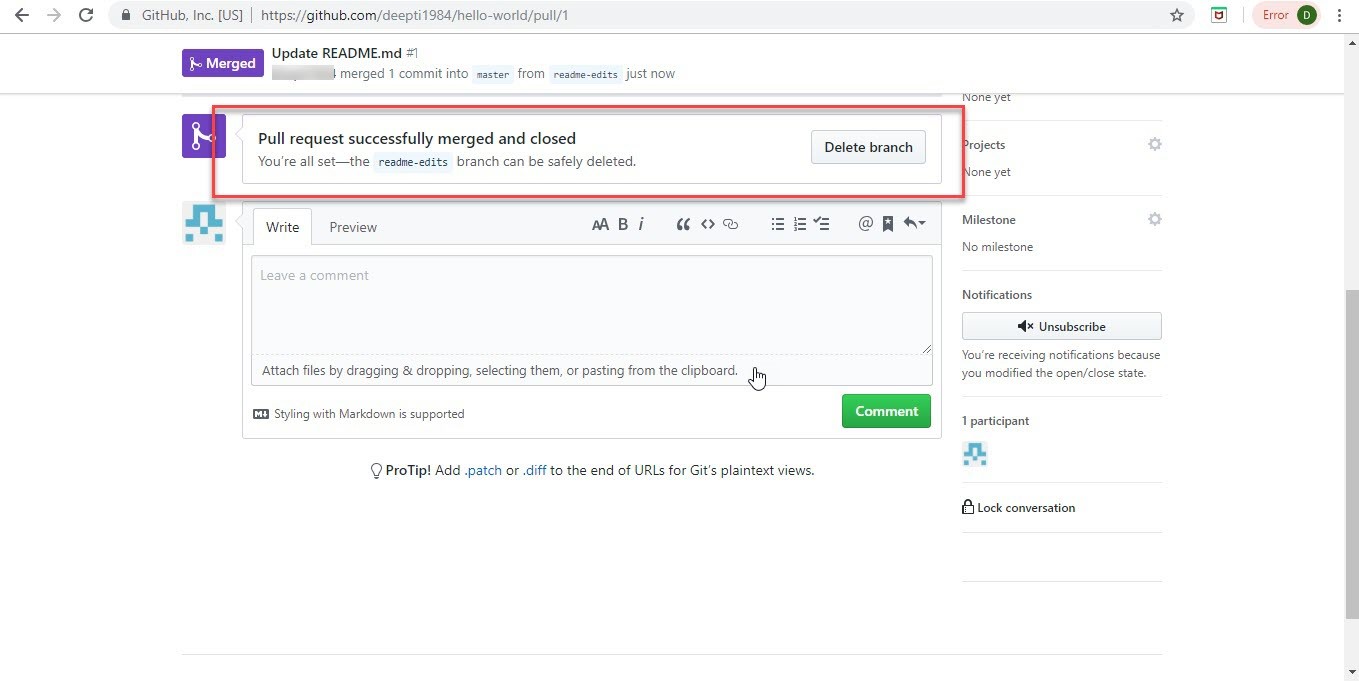
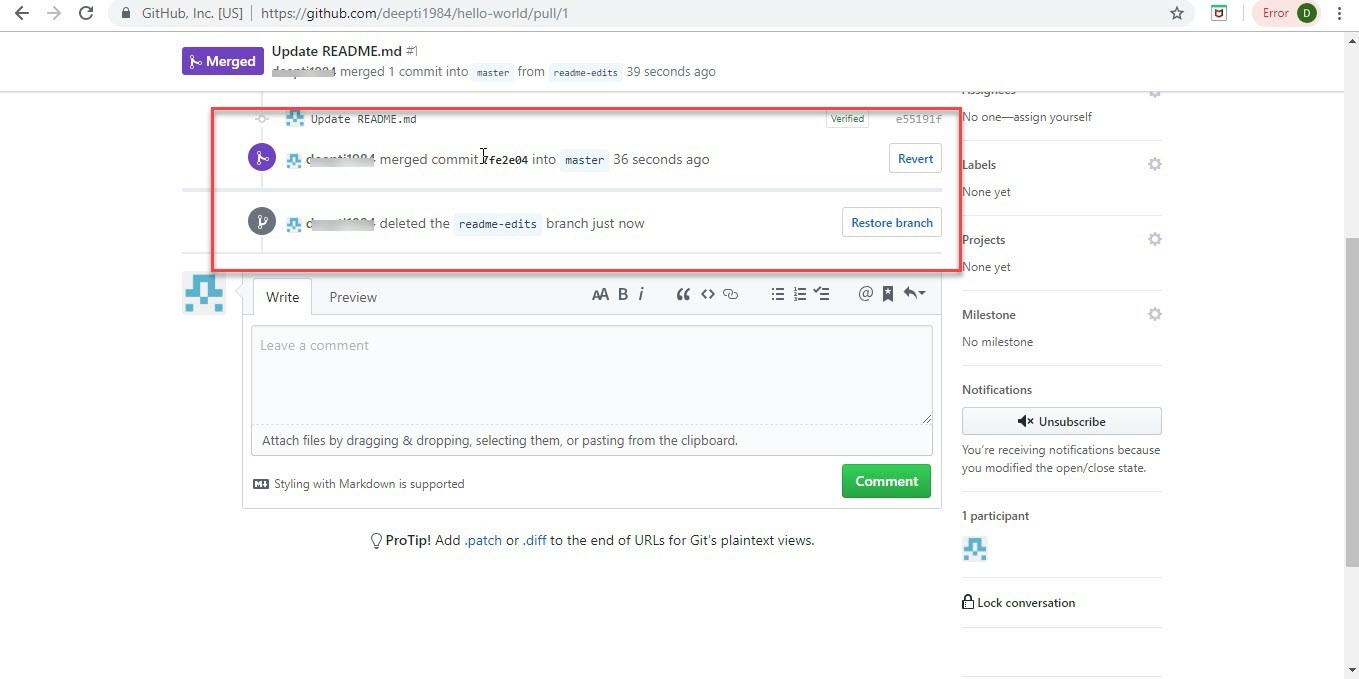
Step 18: You will see your username( blurred below) merged 1 commit into master from (your branch name). Pull request is successful and closed. We can now delete the branch we created to make the update, by clicking on Delete branch button.
Step 19: You will see the messages for merge as
well as the branch deletion with your username.
You can revert the changes or restore the branch by clicking on the
appropriate button.
So, these are the steps you can use to create a new repository, create a new branch and make some updates – create a new file. Then, create a pull request to compare and merge the changes into master branch. Then, you can choose to delete the branch once the changes are merged.
Version Control Systems – Best Practices
- Ensure that all your code, documents, configuration files, etc are tracked under version control system.
- Update your working copy frequently to incorporate changes made by others in your local working copy.
- Test the code extensively in your local machine before committing to make sure it’s really completed with no side effects.
- Commit often, self-contained changes regularly but don’t commit in a hurry when half work is done because it may break any functionality.
- Write a descriptive commit message so that any other member can easily understand what changed in this commit and how its different from previous commit.
- The tools are line-based so please be extra careful and ensure that the file format remains unchanged during code updates.
- Use an easy-to-remember project structure and naming convention which is common to avoid any confusion or misinterpretation.
- Setting up email notifications to send out an email whenever any commit is made.
- Always take backups of your repository at regular intervals or schedule an overnight backup for all the repositories.
Summary
Hope you enjoyed reading this document and it helped you learn about Version Control and Git. This tutorial will aid you take the first step in your learning journey. It covers both the theoretical concepts as well as hands-on examples, which will be very important when you set up your local Git repository or your GitHub account.
If you follow the steps and run the commands mentioned above, you will realize the true power of this tool, Git.

0 Comments