What is Continuous Monitoring?
Continuous Monitoring is the process and technology used to detect compliance and risk issues associated with an organization’s financial and operational environment. The financial and operational environment consists of people, processes, and systems working together to support efficient and effective operations.
Continuous Monitoring refers to the process and technology required to incorporate monitoring across each phase in DevOps and IT operation lifecycles. It helps to continuously ensure the health performance, and reliability of your application and infrastructure as it moves from development to production.
Why we need Continuous Monitoring?
Continuous Monitoring assists IT organizations, DevOps teams in particular, with procuring real-time data from public environments. It also helps general feedback on the overall IT setup, including offsite network and deployed software.
What Are Continuous Monitoring Tools?
- Lansweeper
- Spiceworks
- Snort
- SolarWinds
- Nagios
- Tenable
- Ipswich WhatsUp Gold
- Paessler PRTG
- Rapid7 Insight
- Cisco Identity Service Engine
Nagios installation has been divided into three parts.
- Installing Nagios on Master
- Installing NRPE on slave
- Installing Check NRPE Plugin on Master
Green Terminal is Master, Yellow Terminal is Slave machine.
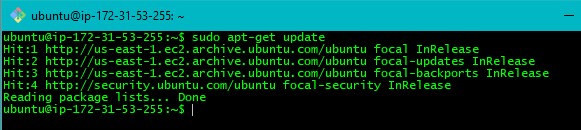
Step 1: Update the master.
The Command is sudo apt-get update
Output Is:
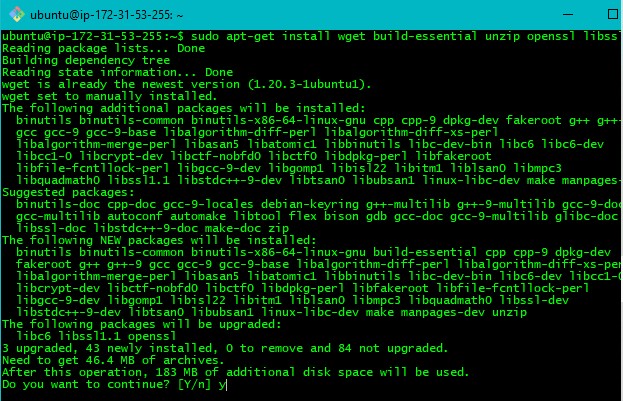
Step 2: Run the following command
sudo apt-get install wget build-essential unzip openssl libssl-dev
Output Is:
Step 3: Run the following command
sudo apt-get install apache2 php libapache2-mod-php php-gd libgd-dev
Output Is:

Step 4: Now, add the user with the commands given below.
sudo adduser nagios
In this command, it asks to enter a password. Give whatever password you want. It helps to view the Nagios on the web-page.
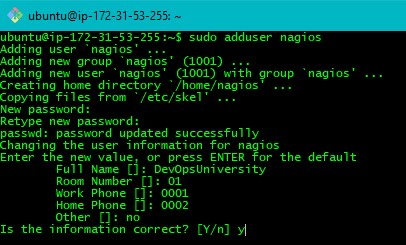
In the above image add Full Name as your wish. And remaining information as same.
Step 5: Run the following commands to complete the user adding process.
sudo groupadd nagcmd
sudo usermod -a -G nagcmd nagios
sudo usermod -a -G nagcmd www-data
Output Is:

Step 6: Now that we are set with the prerequisites, install Nagios Core as shown below.
wget https://assets.nagios.com/downloads/nagioscore/releases/nagios-4.4.2.tar.gz
Output Is:

Step 7: Untar the file with the command shown below.
tar xzf nagios-4.4.2.tar.gz
Step 8: Enter the Nagios-4.4.2 directory.
The Command is cd nagios-4.4.2
Output Is:

Step 9: Now with the given command make the required configurations.
sudo ./configure –with-command-group=nagcm
Output Is:
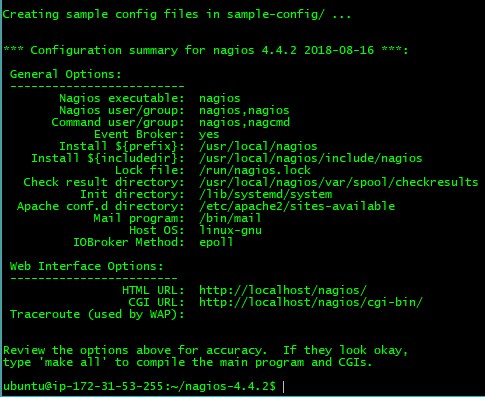
Now we will make all the configuration work.
Step 10:
sudo make all
Output Is:
Step 11: Run the following command.
sudo make install
Output Is:
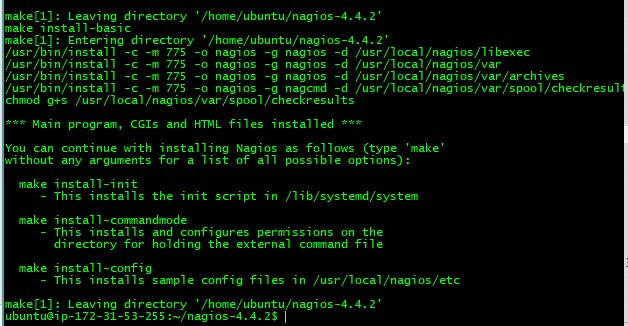
Step 12: Install init and run the following command.
sudo make install-init
Output Is:

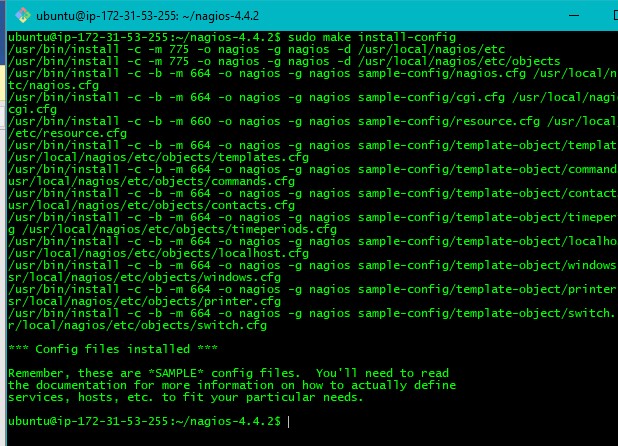
Step 13: Install config and run the following command.
sudo make install-config
Output Is:
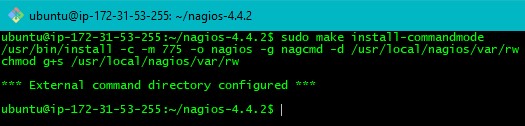
Step 14: Install command mode as shown below:
sudo make install-commandmode
Output Is:
Step 15: Before moving ahead run the following commands to copy eventhandlers scripts under the libexec directory.
sudo cp -R contrib/eventhandlers/ /usr/local/nagios/libexec/
sudo chown -R nagios:nagios /usr/local/nagios/libexec/eventhandlers
Output Is:

Step 16: Create Apache configuration on the nano.
sudo nano /etc/apache2/conf-available/nagios.conf
ScriptAlias /nagios/cgi-bin “/usr/local/nagios/sbin”
Options ExecCGI
AllowOverride None
Order allow,deny
Allow from all
AuthName “Restricted Area”
AuthType Basic
AuthUserFile /usr/local/nagios/etc/htpasswd.users
Require valid-user
Alias /nagios “/usr/local/nagios/share”
Options None
AllowOverride None
Order allow,deny
Allow from all
AuthName “Restricted Area”
AuthType Basic
AuthUserFile /usr/local/nagios/etc/htpasswd.users
Require valid-user
Copy the file and past it on nano editor
Output Is:
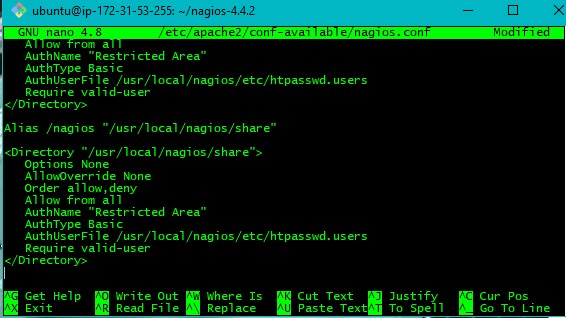
Save the file and exit from the nano editor.
Step 17: Add a password as shown below, to complete the apache configuration. The same password which you gave first.
sudo htpasswd -c /usr/local/nagios/etc/htpasswd.users nagiosadmin
Output Is:

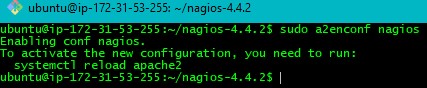
Step 18: Enable Apache configuration.
sudo a2enconf nagios
Output Is:
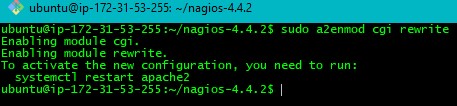
sudo a2enmod cgi rewrite
Output Is:
Step 19: Restart apache service.
sudo service apache2 restart
Output Is:

Step 20: Now go to the main directory.
Cd
Output Is:

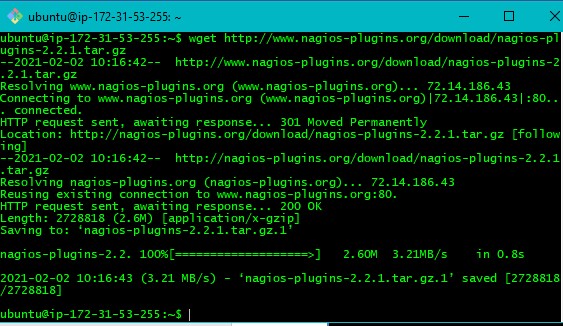
Step 21: To install the required Nagios plugin, download the plugins.
wget https://www.nagios-plugins.org/download/nagios-plugins-2.2.1.tar.gz
Output Is:
Step 22: Untar the file.
tar xzf nagios-plugins-2.2.1.tar.gz
Output Is:

Step 23: Go inside Nagios-2.2.1 directory.
cd nagios-plugins-2.2.1
Output Is:

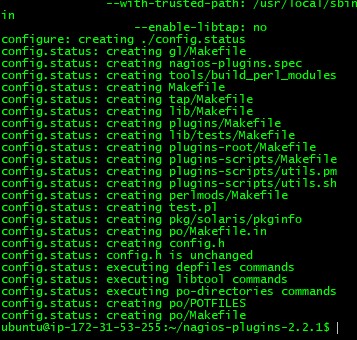
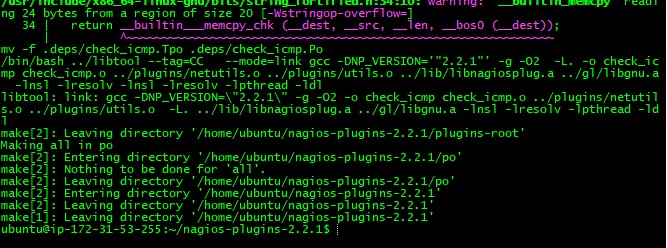
Step 24: Compile the plugins and then complete the plugin installation process running the three commands given below:
sudo ./configure –with-nagios-user=nagios –with-nagios-group=nagios –with-openssl
Output Is:
sudo make
Output Is:

sudo make install
Output Is:
Before we can start using Nagios, we going to need to make a small change in the base configurations.
Step 25: Go to the main directory.
cd
Output Is:

Step 26: Get inside /usr/local/nagios/etc/nagios.cfg
sudo nano /usr/local/nagios/etc/nagios.cfg
Scroll down until you will see. #cfg_dir=/usr/local/nagios/etc/servers
Remove # from #cfg_dir=/usr/local/nagios/etc/servers
Output Is:
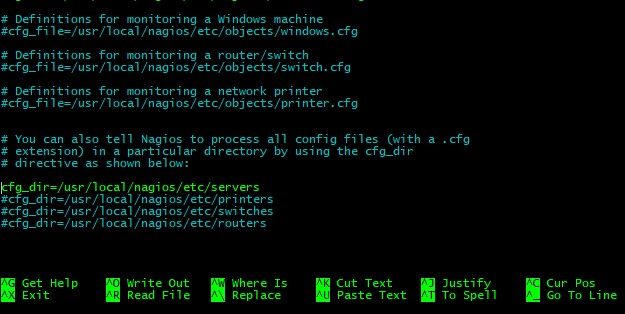
Save and exit the file.
Step 27: Make the following directory.
sudo mkdir /usr/local/nagios/etc/servers
Output Is:

Step 28: Verify the configuration before starting Nagios.
sudo /usr/local/nagios/bin/nagios -v /usr/local/nagios/etc/nagios.cfg
Output Is:
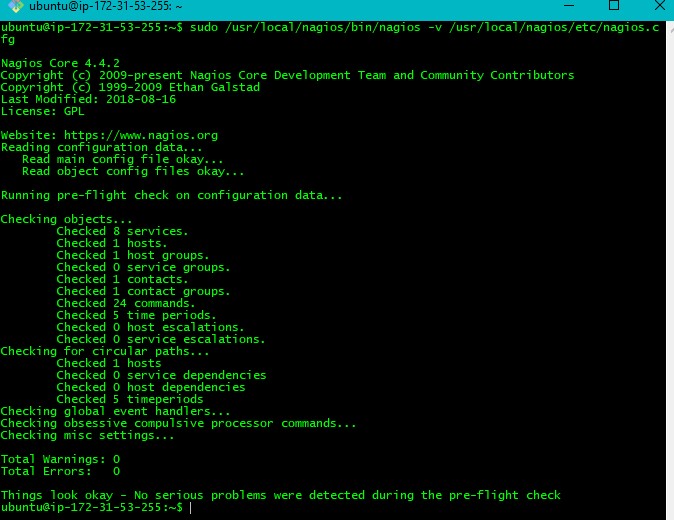
Here we can see there are no warnings and no errors. Everything looks fine!
Step 29: Start Nagios.
sudo service nagios start
Output Is:

sudo systemctl enable nagios
Output Is:

In the slave machine, we are adding a host in Nagios.
Installing NRPE on the slave
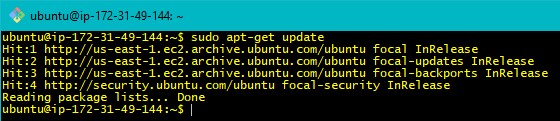
Step 1: Update the slave machine
sudo apt-get update
Output Is:
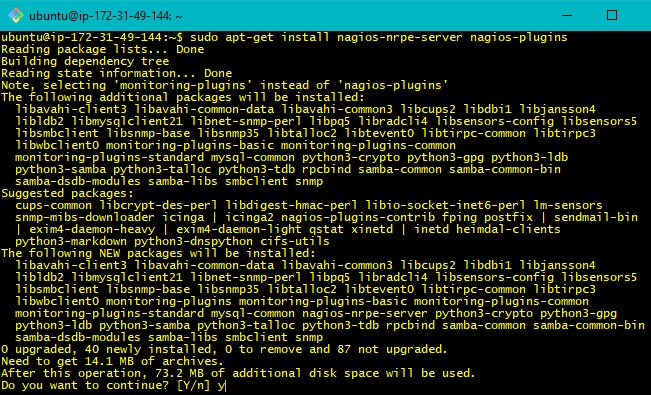
Step 2: Install the required plugins.
sudo apt-get install nagios-nrpe-server nagios-plugins
Output Is:
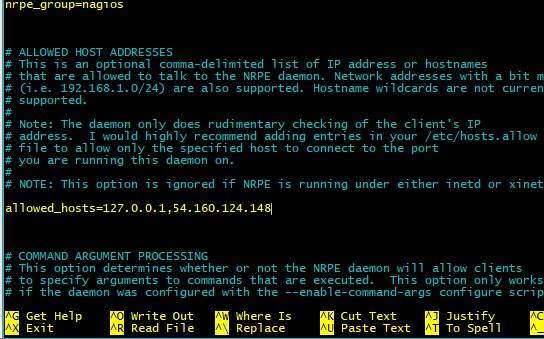
Step 3: Open the configuration file as shown below:
sudo nano /etc/nagios/nrpe.cfg
In the file allowed_hosts=127.0.0.1,xxx to allowed_hosts=127.0.0.1, master IP.
After made changes save and exit the file.
Output Is:
Step 4: Start NRPE service as shown below:
sudo /etc/init.d/nagios-nrpe-server restart
Output Is:

Install check_nrpe on Master
Now we need to install check_nrpe on Master.
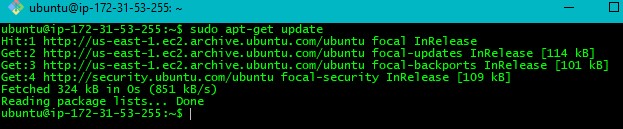
Step 1: Update the master machine
sudo apt-get update
Output Is:
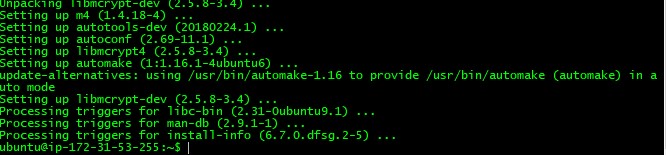
Step 2: Install the following package.
sudo apt-get install -y autoconf automake gcc libc6 libmcrypt-dev make libssl-dev wget openssl
Output Is:
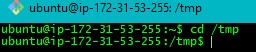
Step 3: Get in the tmp
cd /tmp
Output Is:
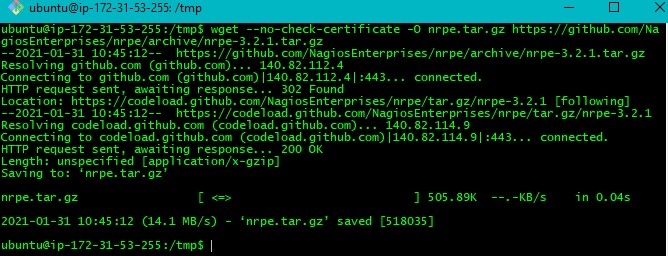
Step 4: Download the source.
wget –no-check-certificate -O nrpe.tar.gz
https://github.com/NagiosEnterprises/nrpe/archive/nrpe-3.2.1.tar.gz
Output Is:
Step 5: Untar the file.
tar xzf nrpe.tar.gz
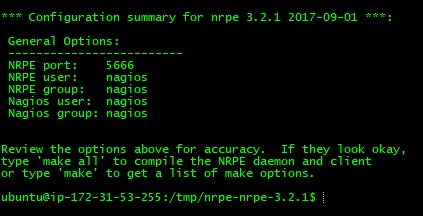
Step 6: Then execute the following command.
cd
cd /tmp/nrpe-nrpe-3.2.1
./configure
Output Is:
You will see this output
Step 7: Run the check_nrpe
make check_nrpe
Output Is:

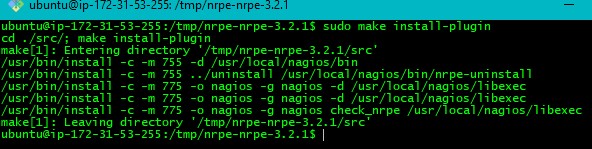
Step 8: Install plugins.
sudo make install-plugin
Output Is:
Step 9: We will check the connection
cd
/usr/local/nagios/libexec/check_nrpe -H
Now we need to make the following configuration file before we observe the connection.
Step 10:
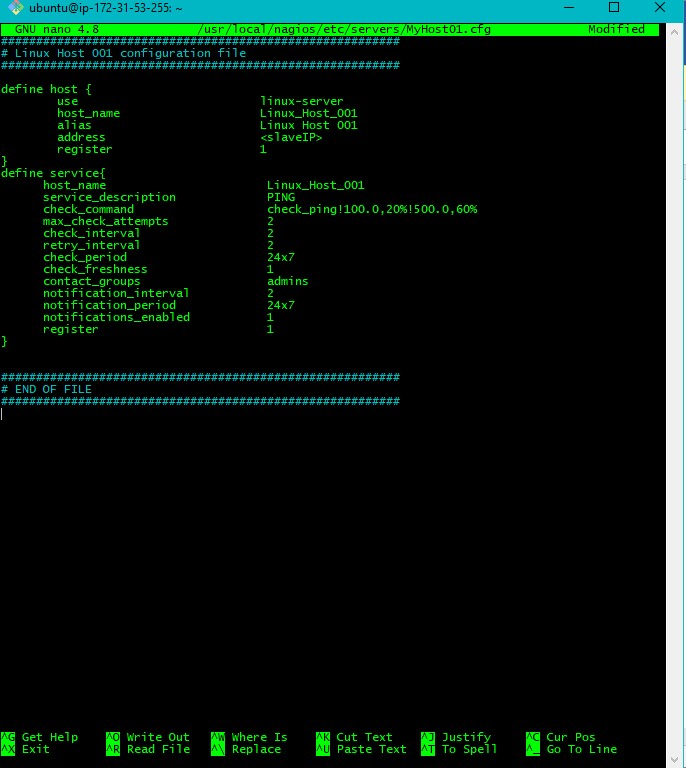
sudo nano /usr/local/nagios/etc/servers/MyHost01.cfg
It will open a nano editor. Copy and paste the below file in the nano editor
#########################################################
# Linux Host 001 configuration file
#########################################################
| define host { | |
| use | linux-server |
| host_name | Linux_Host_001 |
| alias | Linux Host 001 |
| address | |
| register | 1 |
| } | |
| define service{ | |
| host_name | Linux_Host_001 |
| service_description | PING |
| check_command | check_ping!100.0,20%!500.0,60% |
| max_check_attempts | 2 |
| check_interval | 2 |
| retry_interval | 2 |
| check_period | 24×7 |
| check_freshness | 1 |
| contact_groups | admins |
| notification_interval | 2 |
| notification_period | 24×7 |
| notifications_enabled | 1 |
| register | 1 |
| } |
#########################################################
# END OF FILE
#########################################################
After adding the content, the configuration file should look like this:
Step 11: Now verify the configuration again
sudo /usr/local/nagios/bin/nagios -v /usr/local/nagios/etc/nagios.cfg
Output Is:
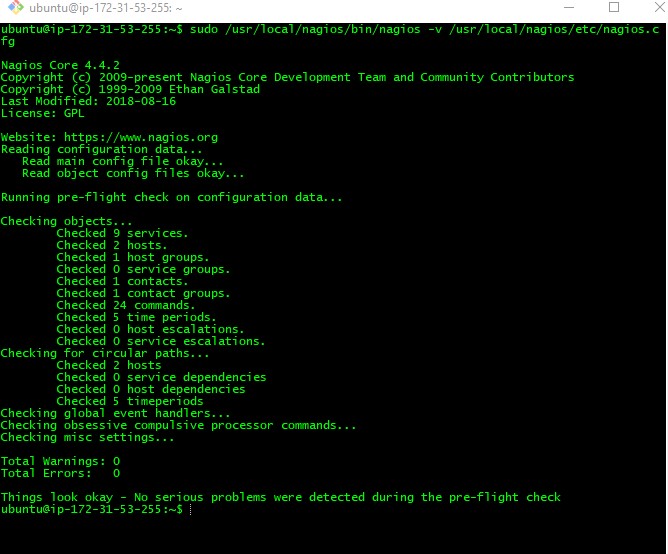
Here we can see there are no errors and no warnings.
Step 12: Start Nagios
sudo service nagios restart
Output Is:

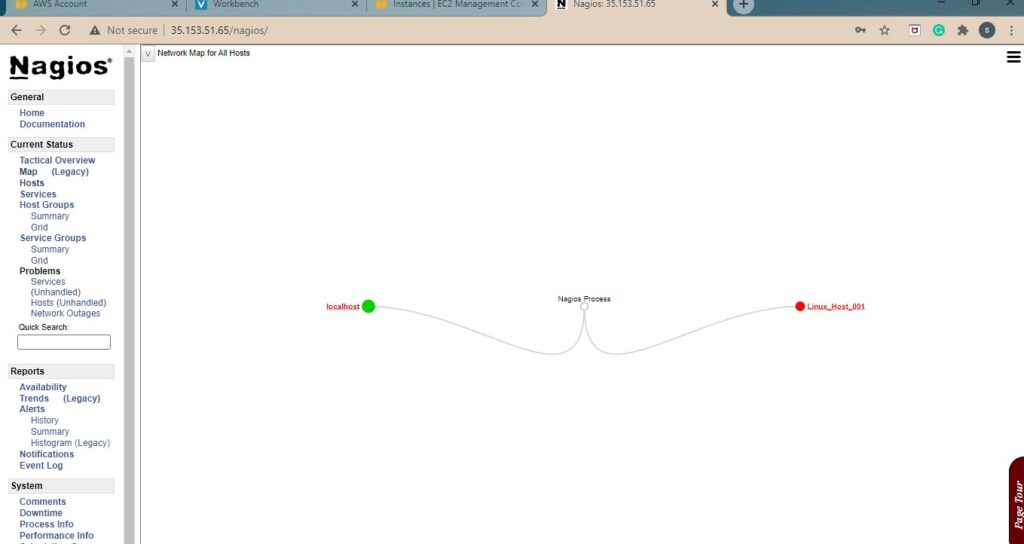
Installation of Nagios is done. To see the Nagios, go to the web-page
https://MasterIP/nagios/
Output Is:
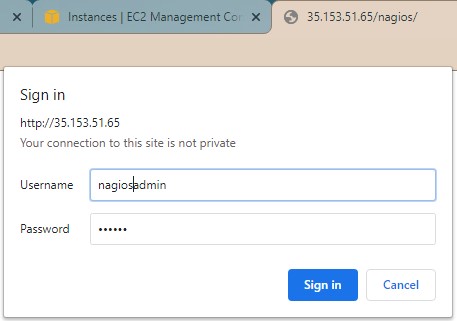
The username should be: nagiosadmin
Password: Which we gave in first
After Sign in you will saw this
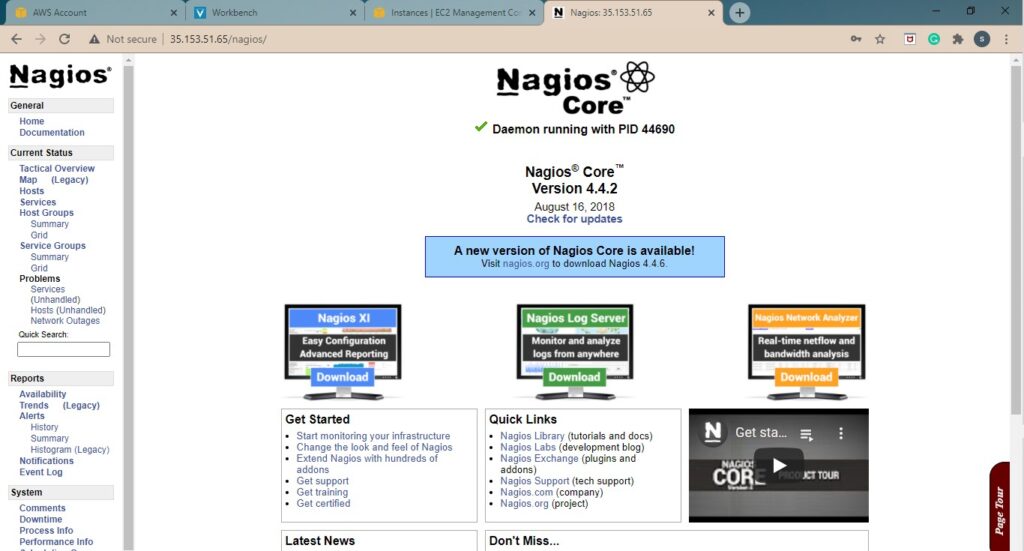
On the left side, there is a current status part. In that there is a part called, click on the map